This article will guide you on how to add, disable, and delete an administrator through the Thexyz Email Control Panel. If you are looking to add user to the client area, please see: Adding and managing user accounts in the client area
Add an email administrator
You can add multiple administrators with varying degrees of account access. There are Super, Standard, and Limited administrators. Limited administrators have access to only specifically assigned sections of the Control Panel. You can also monitor and export logs of all administrator logins and actions.
Log in to Thexyz Email Control Panel.
Under Common Actions, click Manage Administrators or select Administrators from the My Account menu.
Click Add Admin.
Enter the following information under Add Administrator:
First Name - Enter the administrator’s first name.
Last Name - Enter the administrator’s last name.
Username - Enter a unique name for the account. If the username that you enter is used elsewhere on the email hosting system, you are prompted to enter a new username.
Email - Enter the administrator’s email address. Note: We recommend using an email address that is not hosted under the same account.
Phone Number (optional) - Enter a valid phone number for the administrator.
Select the level of security for the administrator:
Super - Allows full access to the control panel and includes the ability to create and manage administrator accounts.
Standard - Permits the administrator to manage all products and domains under the account while restricting access to account-level operations.
Limited - Allows access only to the control panel areas that you specify. (You can select the specific areas at the bottom of the screen after selecting Limited. See step 6.)
Select which notifications you want this administrator to receive.
Configure Security Settings
Every email administrator is required to use Multi-factor authentication.
Specify whether the password never expires or expires in a specified number of days.
Select Login restricted to IP address(es) to allow access only from certain IP addresses, such as the office or home network.
Configure Admin Permissions
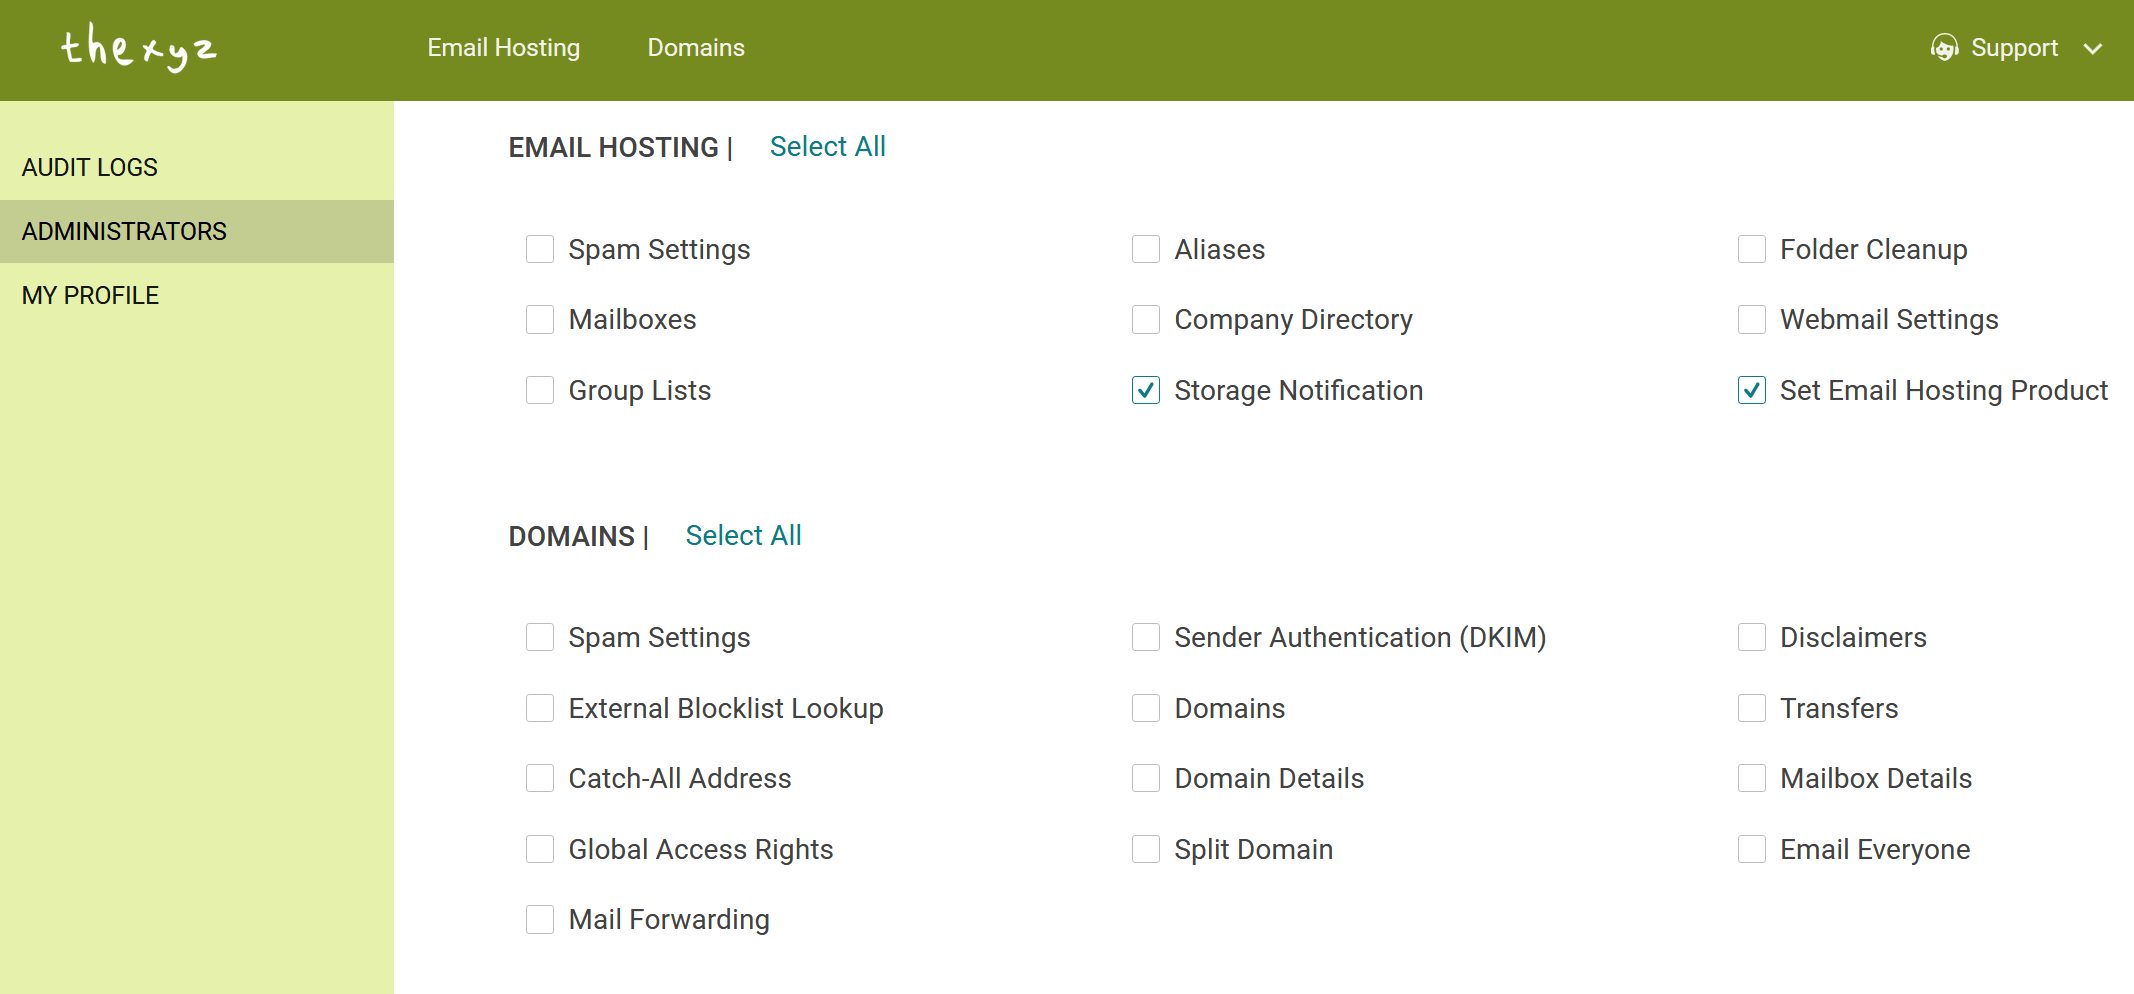
If you selected Limited as the type for your newly created administrator, perform the following actions at the bottom of the screen:
On the Permissions tab, select the check box for each area to which this limited administrator should have access. By default, limited administrators have access to all domains in the account.To specify which domains the administrator can access, click the Domain Access tab.
Use the Filter and Search tools to locate the domains associated with the account.
In the Current Domains box, select the domain or domains that you want to allow the administrator to access. To select multiple domains, hold the Ctrl key as you click each domain, and then click Add.
To select multiple domains, hold the Ctrl key as you click each domain.
To remove a domain from the Access-Allowed box, click the domain and then click Remove.
Click Save.
An email is then sent to the newly created administrator’s email address. The email contains instructions for the administrator to log in to their new account and set up their Two-Factor Authentication and password.
Delete an administrator
Deleting an administrator removes the admin user from the control panel. If access needs to be granted again, a different Super Administrator must re-create the user.
To delete an administrator, log in to the control panel and perform the following steps:
Under Common Actions, click Manage Administrators or select Administrators from the My Account menu.
Select the check box next to each administrator that you want to delete. If you delete the logged-in administrator, you are logged out upon deletion. The account must have at least one administrator.
Click Delete.
In the confirmation box, click OK.
Disable an administrator
Disabling administrators remove their ability to log in to the control panel, but it keeps their information visible so that they can be re-enabled in the future.
To disable an administrator, log in to the control panel and perform the following steps:
Under Common Actions, click Manage Administrators or select Administrators from the My Account menu.
In the Action column for the administrator, click Disable.
Note: You can reverse this action by clicking Enable.
In the confirmation popup box, click Delete “X” Administrator. (The X corresponds to the number of administrators that you have selected for deletion.)
