You can request a Let’s Encrypt certificate for your sites with a click from the Hosted Domains section of the Web Hosting Control Panel.
In there, click on the Edit Host icon in the Actions column:
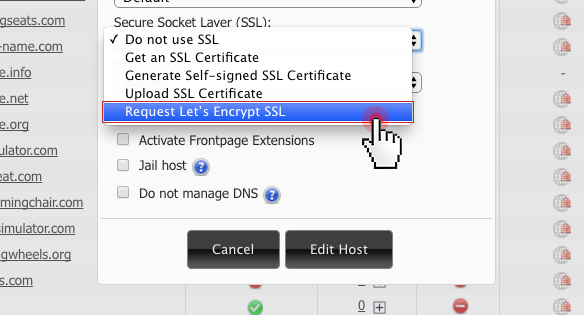
Then click on the SSL Certificates drop-down menu:
The ‘Request Let`s Encrypt SSL’ option is located at the bottom of the list of SSL options.
Once you’ve selected the Let’s Encrypt option, just click on the Edit Host button and allow a few seconds for the certificate to be generated.
NOTE: Make sure you’ve selected a shared SSL IP address (or a dedicated IP, if available) from the IP Address drop-down menu.
That’s it! The Let’s Encrypt certificate has been installed on the selected domain name.
Now your domain will feature a Let’s Encrypt icon in the SSL table:
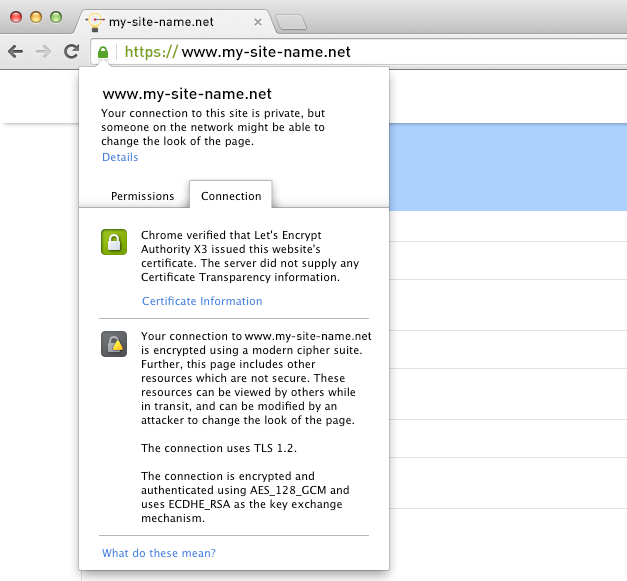
That’s it! You will now see a green padlock in front of your domain in your browser’s address bar:
All browsers will now recognize yours or your customer’s site as being secure.
NOTE: Since the Let’s Encrypt certificate generation process involves domain/DNS validation, a domain needs to have valid NS records in order for the validation to go through.
For this reason, if the ‘Do Not Manage DNS’ option is enabled for a given domain, the Let’s Encrypt feature will not be visible.
How to ensure proper Let’s Encrypt certificate installation
Now that your site loads over HTTPS, you need to make sure that it is working properly and that http://www.my-site-name.net is pointing to https://www.my-site-name.net.
Here is how to check whether HTTPS has been properly set up on your site: use an online service like SSL Labs, which can thoroughly examine the configuration of any SSL web server on the web; visit some of your site’s pages and see if they all display a green padlock to the left of the URL;
Now that your site loads over HTTPS, you need to redirect all HTTP URLs to their HTTPS counterparts. You can do that by adding a few lines of code in your .htaccess file.
This way, you will inform the search engines to now consider only the HTTPS URLs.
To test whether or not the HTTP->HTTPS redirection has successfully gone through, you can do the following: enter your-domain.com in the Google search bar;
Check if all of the indexed links have been properly redirected and are now using the HTTPS protocol;
Keep in mind that it will take some time until the Googlebot picks up the redirection.
Plus, you will need to submit an updated sitemap for your site.
Since the Search Console treats the HTTP and HTTPS versions as completely separate sites, you will need to add a new HTTPS property first and then re-submit your sitemap.
If you get mixed HTTP/HTTPS content warnings, you can fix them using tools like the SSL Insecure Content Fixer.—
A revolutionary initiative, Let’s Encrypt is the fruit of a great community effort. It still has a long way to go as far as global SSL usage is concerned, but it already plays an important role in making the digital world we live in a better place.
We’ll soon give you more information about the newly enabled Let’s Encrypt certificates, so stay tuned!


