Apple Mail is a user-friendly email client that is included with all Mac computers running macOS 10.0 or newer. If you are using Thexyz as your email service provider, you can easily set up your email account in Apple Mail using the IMAP protocol. This knowledge base guide will provide step-by-step instructions for adding your Thexyz email account to Apple Mail on macOS 10.0 or newer. By following this guide, you will be able to access all of your Thexyz emails directly from Apple Mail, making it easy to manage your communications from one convenient location.
This article will assist you with setting up Apple Mail, using IMAP, for your mailbox.
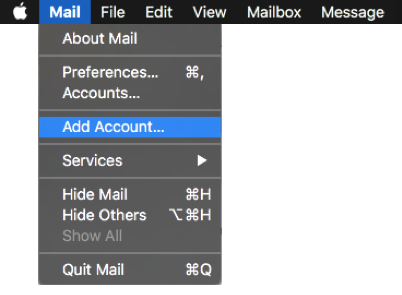
- Launch Mail. If Mail is not in your dock, "Command (⌘) + Space Bar". Then type "Mail" in the Spotlight search. Press enter to launch the Mail application.
- Within Mail, click "Mail" on the top left. Then select "Add Account...".
- In the next prompt, select "Other Mail Account".

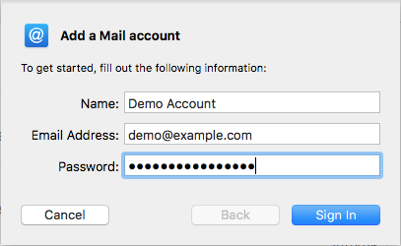
- The pop up dialog will require the following:
- "Name": Enter your first and last name.
- "Email Address": Your email address
- "Password": Enter your mailbox password.
- The pop up dialog will require the following:
- Select "Sign In".
- You will see an alert that says "Unable to verify account name or password.". Along with this alert, you will see more fields that require additional info.
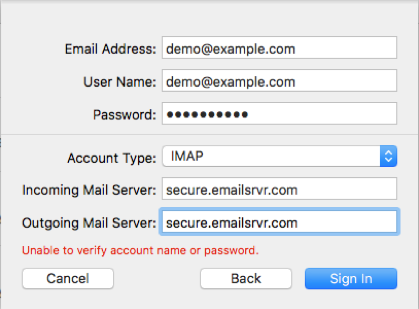
- Ensure the following has been added:
- "User Name": Your email address
- "Account Type": IMAP
- "Incoming Mail Server": secure.emailsrvr.com
- "Outgoing Mail Server": secure.emailsrvr.com
- "Password": Your mailbox password
- Important Note: Apple Mail will usually clear the field. User Name? after entering the Incoming and Outgoing Mail Server fields. Ensure your User Name is filled in with your email address after entering the server information and before clicking. Sign In?.
- Click "Sign In".
- This will create a pop-up that lets you select what you wish to sync. (We recommend Mail and Notes)
- Ensure the following has been added:
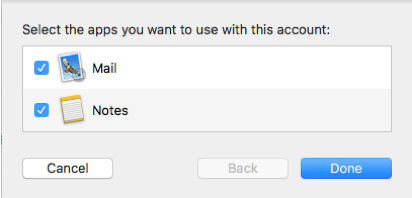
- Click "Done".
- Your email should begin downloading shortly. Please continue below for recommended steps.
We highly recommend configuring Apple Mail to sync your various IMAP folders so that items like your Sent email and Trash email are saved to the correct folder on all of your devices. Below are the steps to do so.
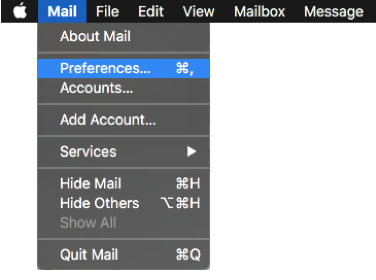
- Within Mail, click "Mail" on the top left. Then select "Preferences".
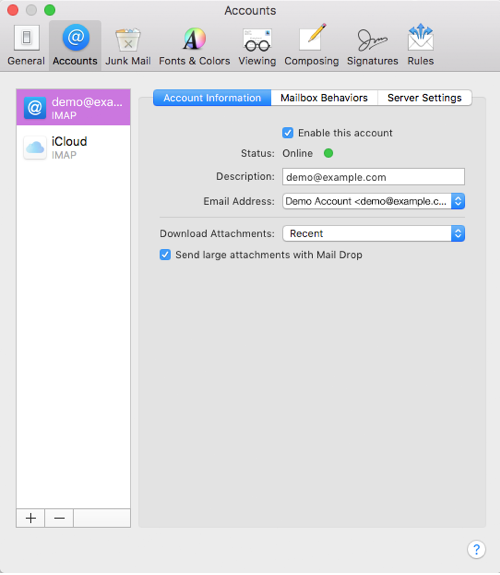
- Select the "Accounts" tab at the top of the window, then select your IMAP email account from the left pane.
- Select the "Mailbox Behaviors".
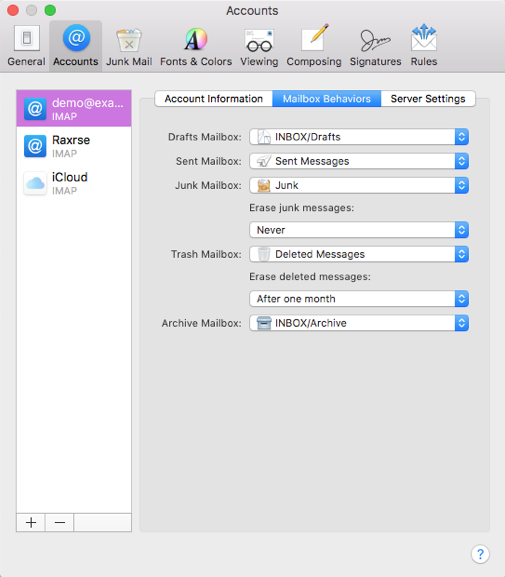
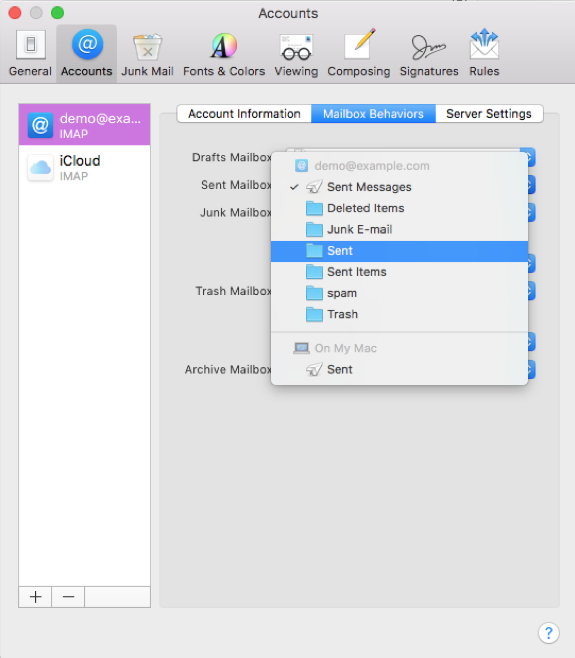
- Click the "Sent Mailbox" dropdown and select the folder "Sent" that's listed under your email address (not the folder listed under "On My Mac").
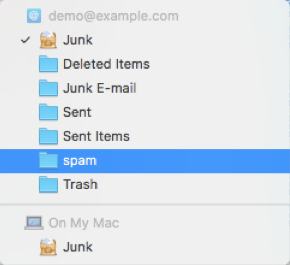
- Click the "Junk Mailbox" dropdown and select the folder "spam" that's listed under your email address (not the folder listed under "On My Mac").
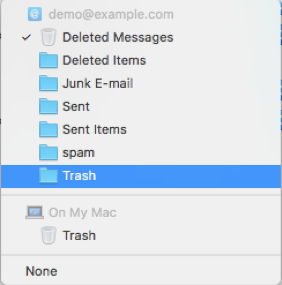
- Click the "Trash Mailbox" dropdown and select the folder "Trash" that's listed under your email address (not the folder listed under "On My Mac").
- Close the "Accounts" window.
- Now you're done! Enjoy your email.
