OSX: Apple Mail (IMAP)
This article will assist you with setting up Apple Mail, using IMAP, for your Hosted Mailbox. If you are looking for directions for a more recent version of Mac Mail, please see macOS 10.12 (Sierra) or higher guide.
- Launch System Preferences. You can easily get to System Preferences by pressing "Command (⌘) + Space Bar". Then type "System Preferences" in the Spotlight search. Press enter to launch the System Preferences application.
- Within System Preferences, click "Internet Accounts". Then, on the right, scroll down and select "Add Other Account...".
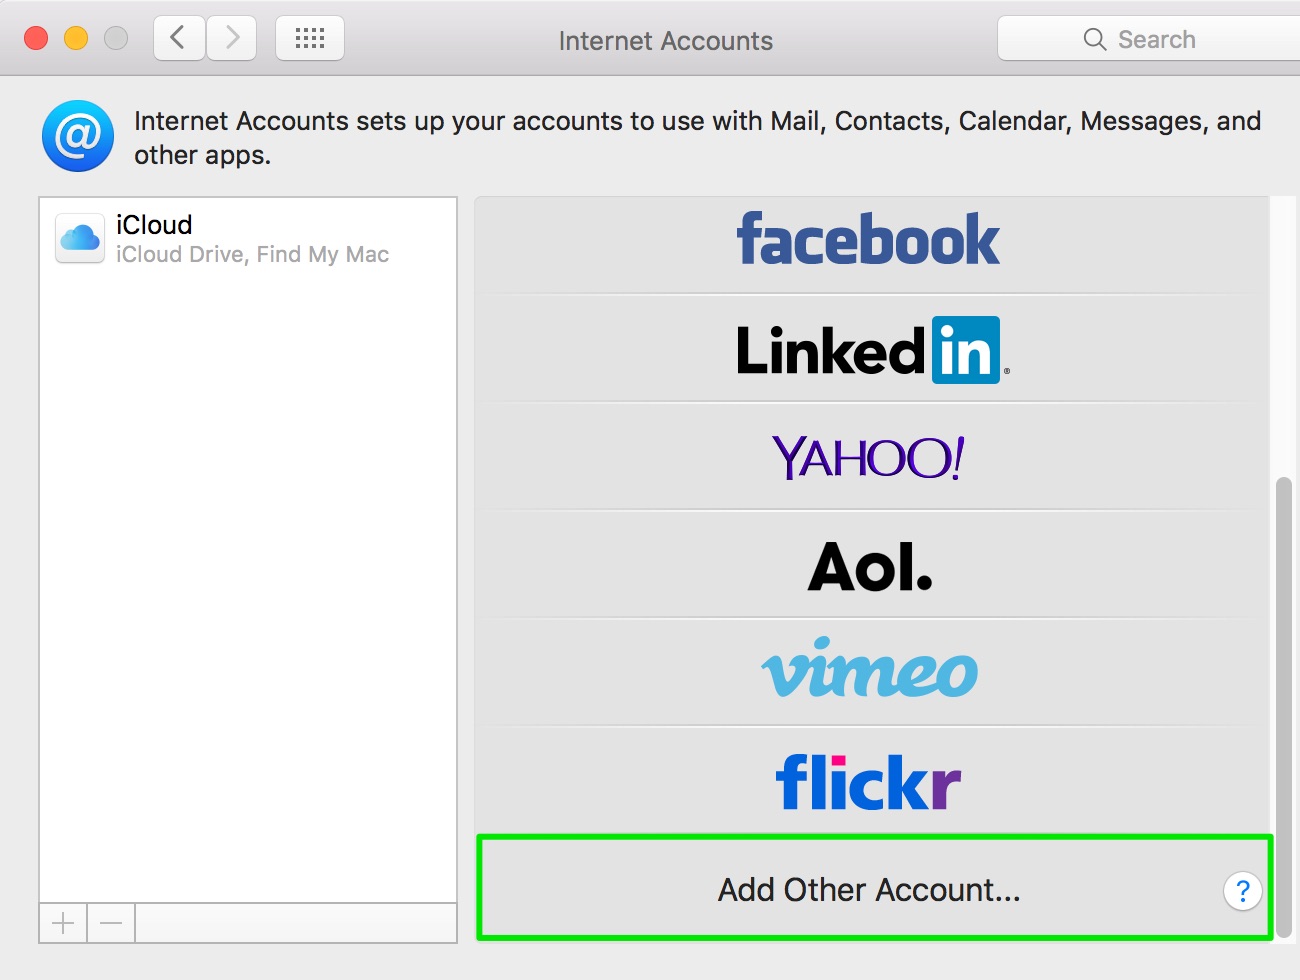
- In the next prompt, select "Mail account".

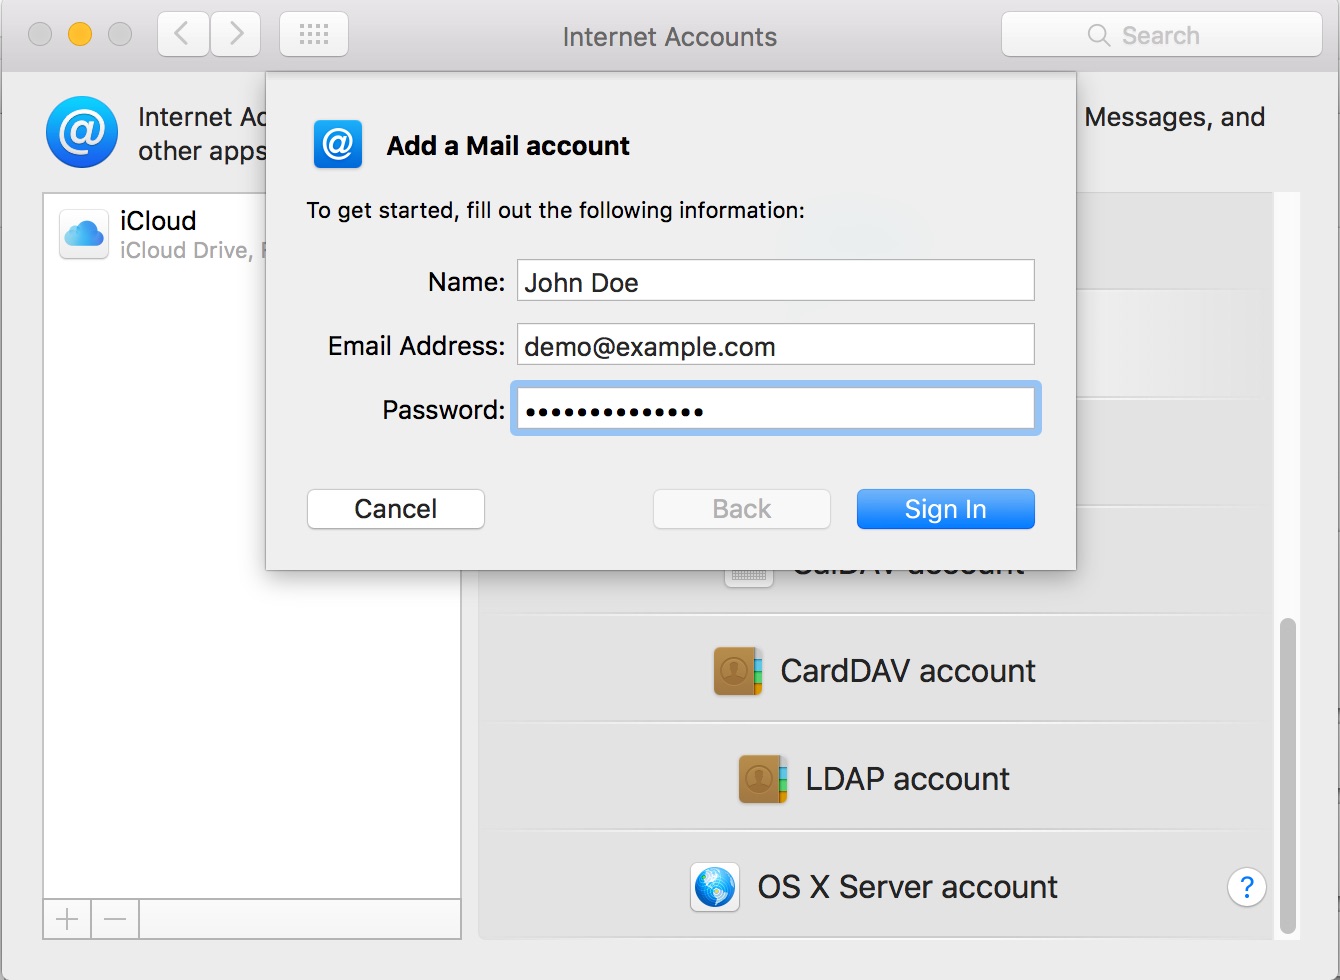
- The pop up dialog will require the following:
- "Name": Enter your first and last name.
- "Email Address": Your full email address
- "Password": Enter your mailbox password.
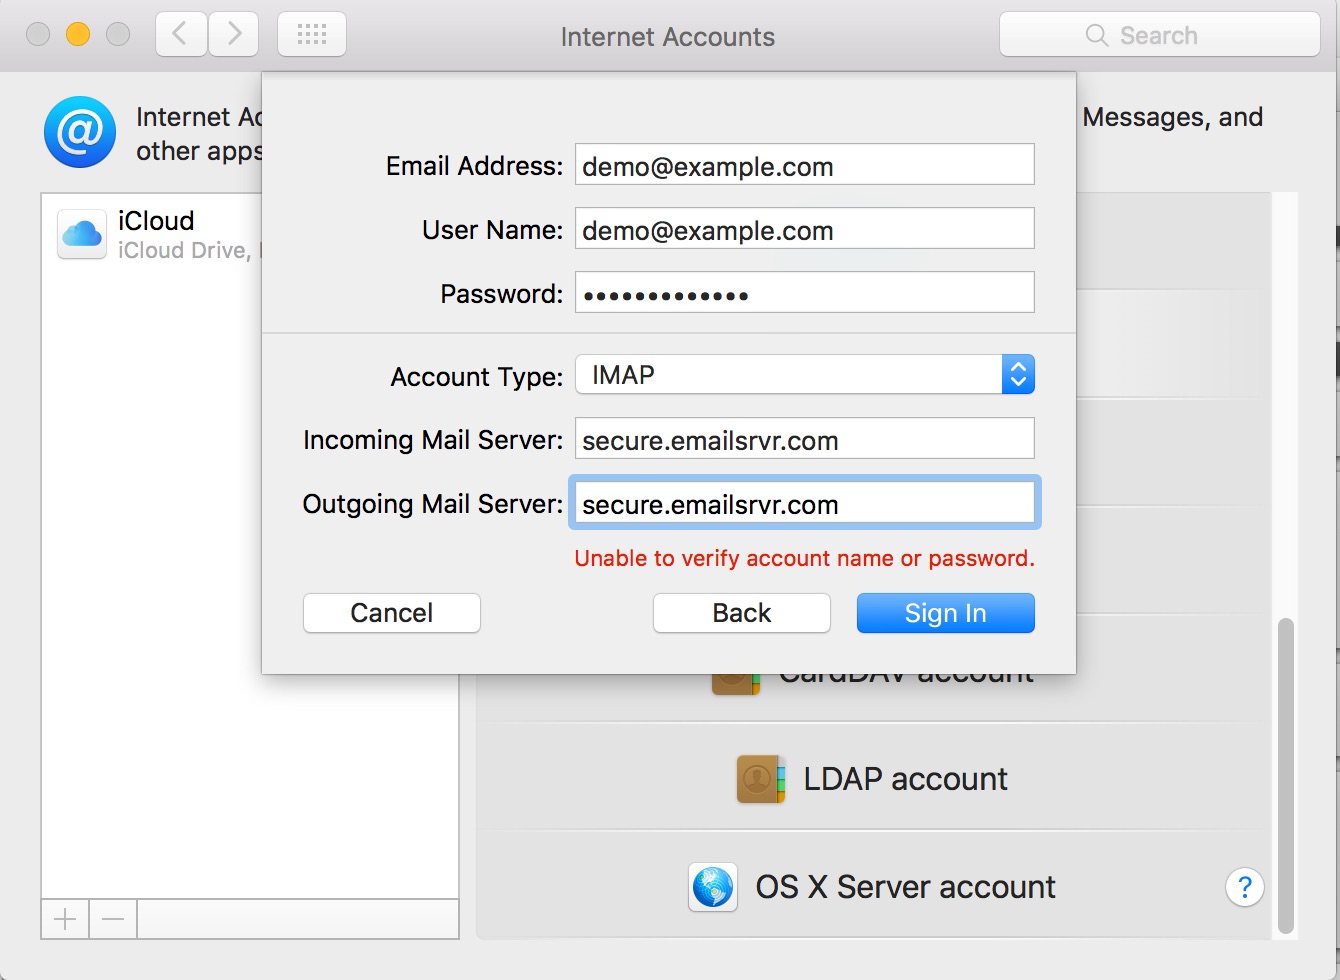
- The pop up dialog will require the following:
- Select "Sign In".
- You will see an alert which says "Unable to verify account name or password.". Along with this alert, you will see more fields that require info.
- Ensure the following has been added:
- "User Name": Your full email address
- "Account Type": IMAP
- "Incoming Mail Server": secure.emailsrvr.com
- "Outgoing Mail Server": secure.emailsrvr.com
- "Password": Your mailbox password
- Click "Sign In".
- This will create a pop up that lets you select what you wish to sync.
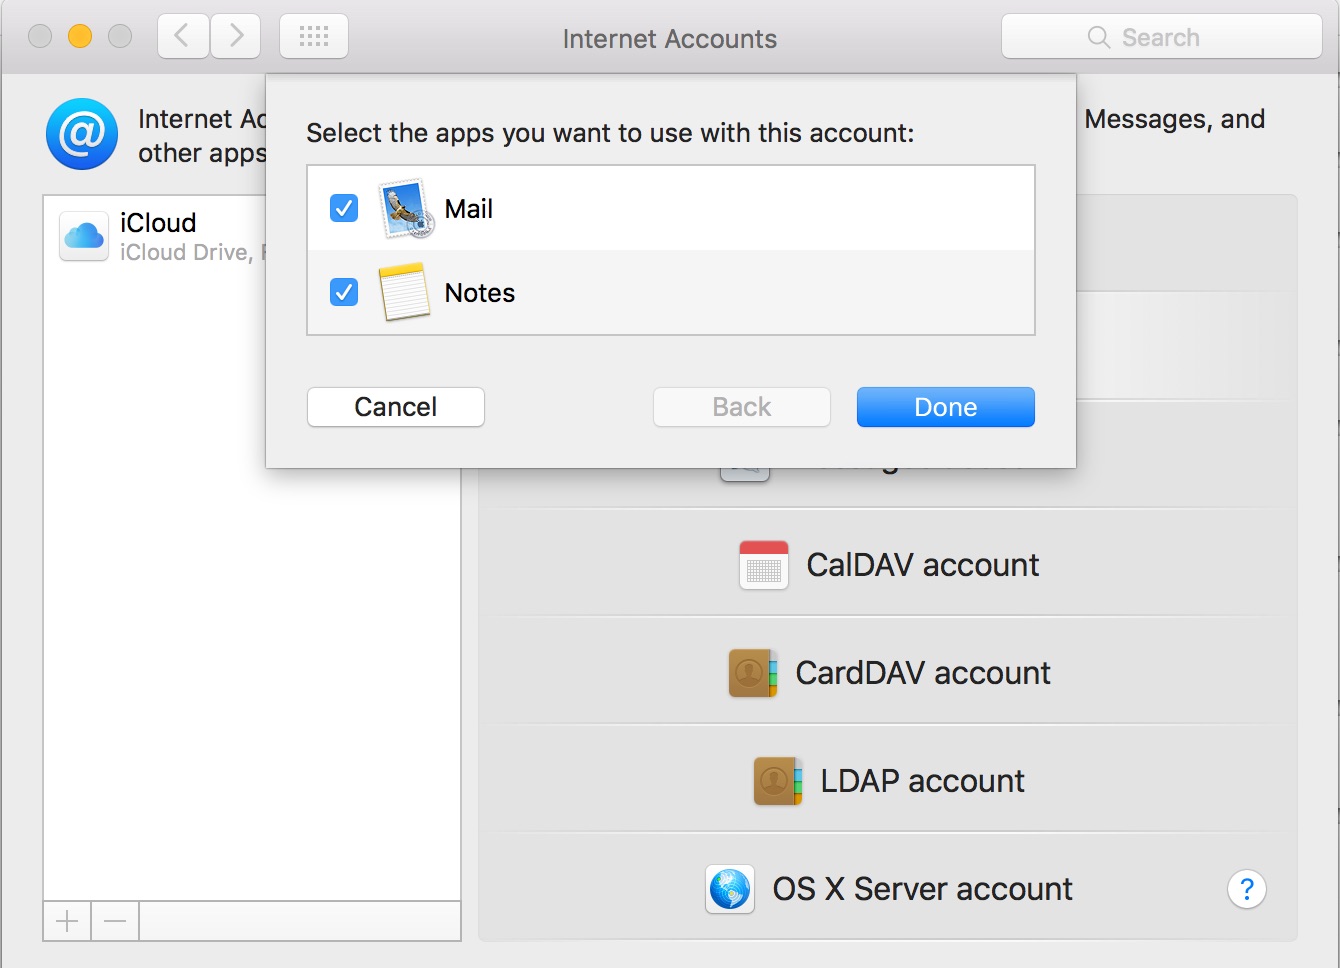
- Click "Done".
- Close the "System Preferences".
- Finally, launch Mail. Your email should begin downloading shortly.
We highly recommend configuring Apple Mail to sync your various IMAP folders. Below are the steps to do so.
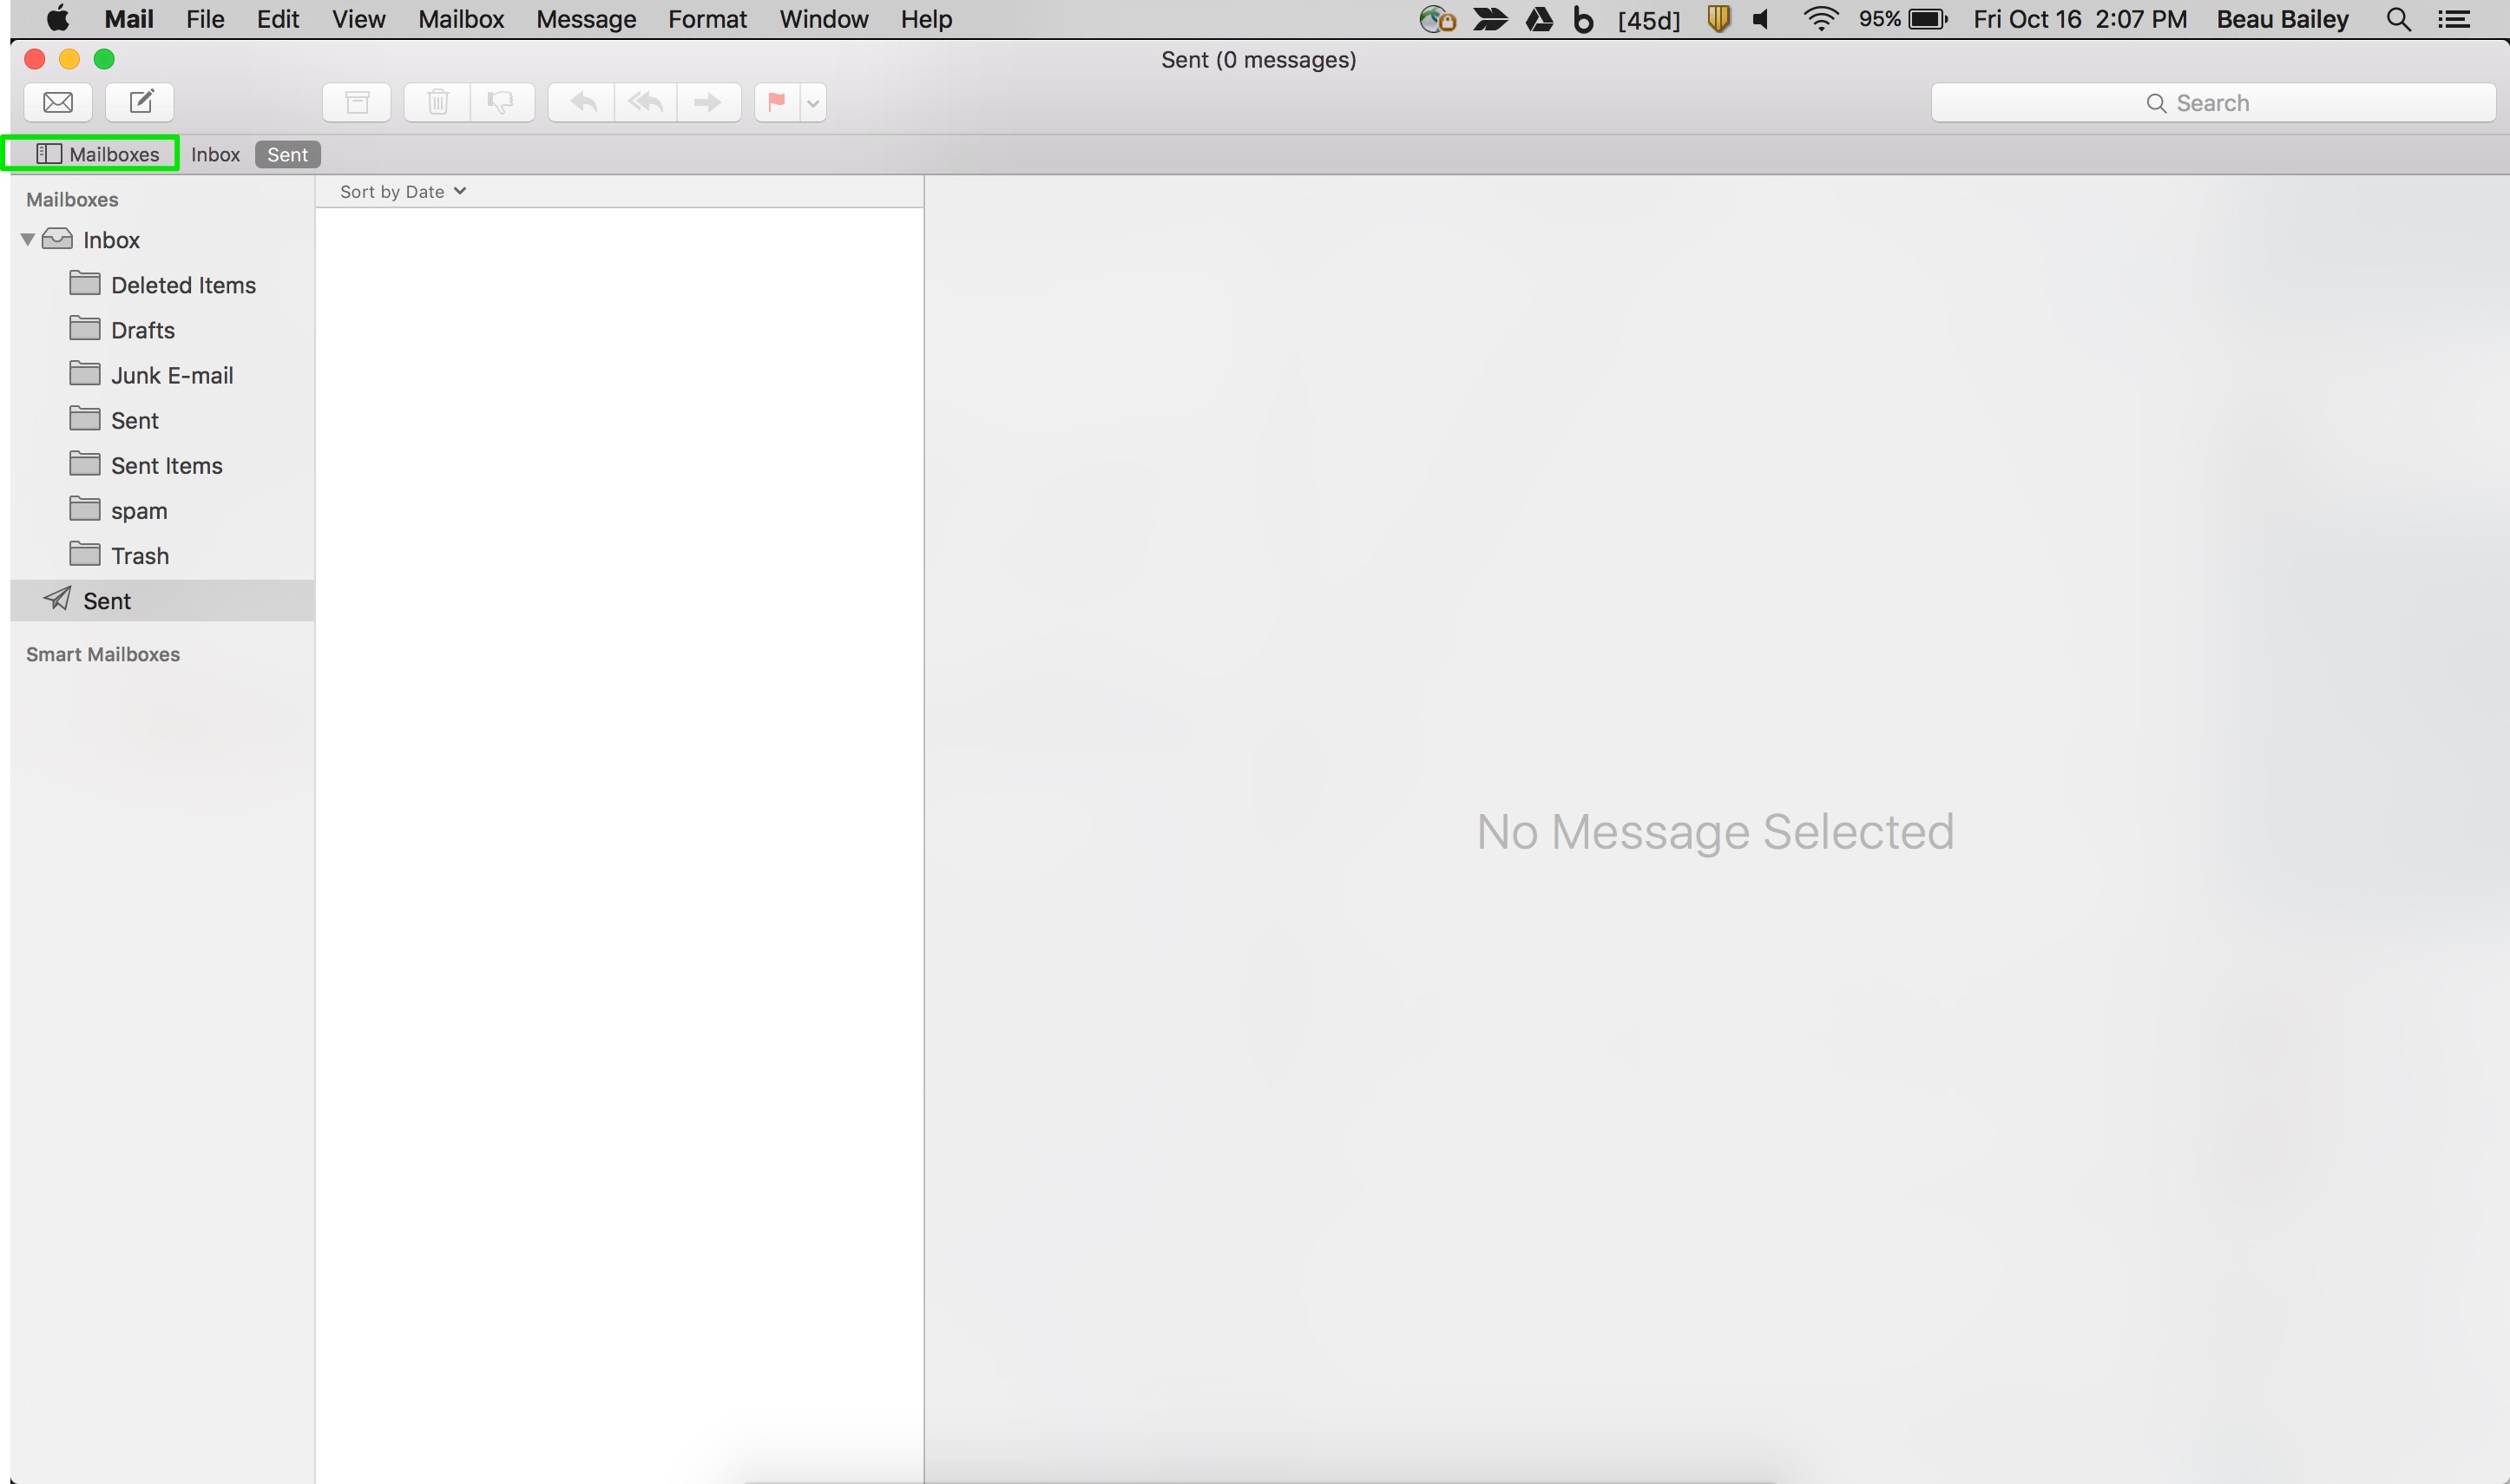
- Open the Mailboxes side pane, if it's not already displayed. Click the "Mailboxes" button, as seen below:
- Under your newly added Mailbox, select the "Sent" folder.
- With the folder highlighted, go to the upper menu and select "Mailbox" -> "Use This Mailbox As" -> "Sent Mailbox". See below:
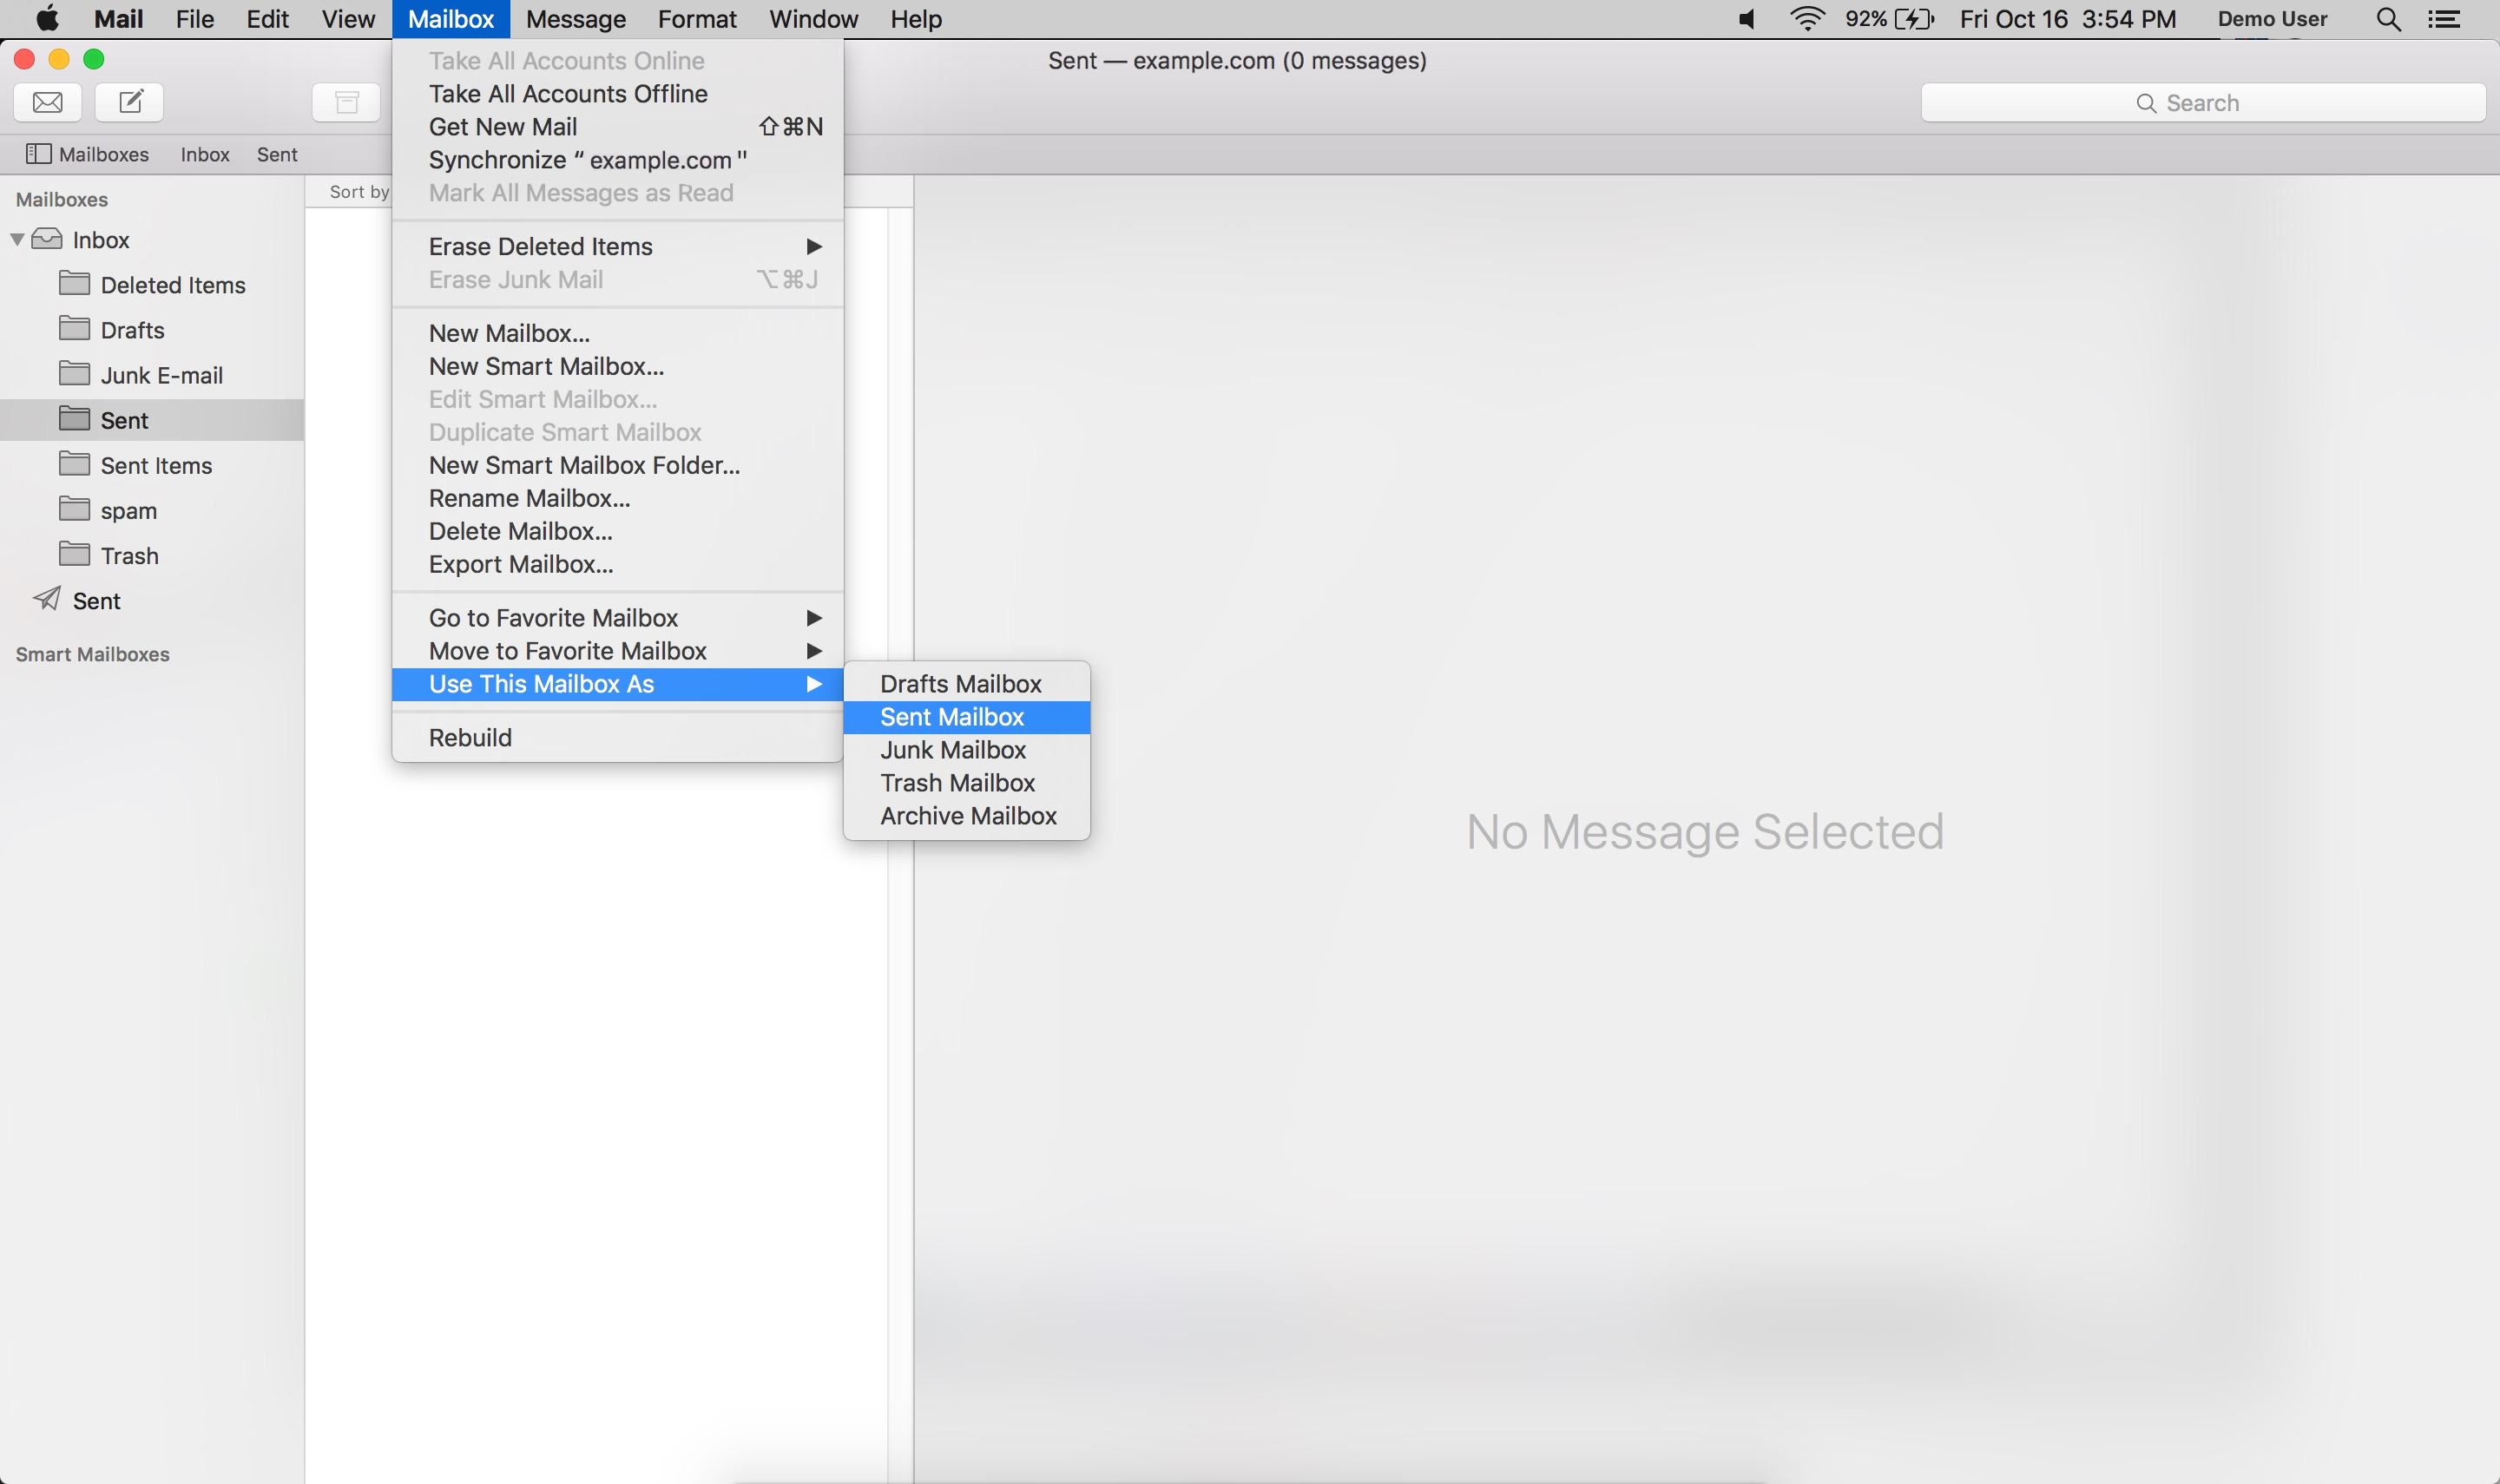
- Repeat this step for each folder that you see within your mailbox (Sent, Spam, Trash, Drafts, etc).
- Once complete. These folders will now be synced with the server, and items within the folder will be accessible by any other devices connected to your mailbox.
- Now you're done! Enjoy your email.
