With an email migration to or from Microsoft 365, we only support Modern Authentication for Microsoft 365 endpoints used for Mailbox, Online Archive mailbox, and Public Folder migrations. Modern Authentication provides a more secure authentication mechanism for registered applications to connect to Microsoft Entra ID and Microsoft 365.
Microsoft's documentation explains enabling and disabling Modern Authentication for Exchange Online.
Registration and Configuration
Important
Below the steps, please find corresponding images representing each step or a group of steps.
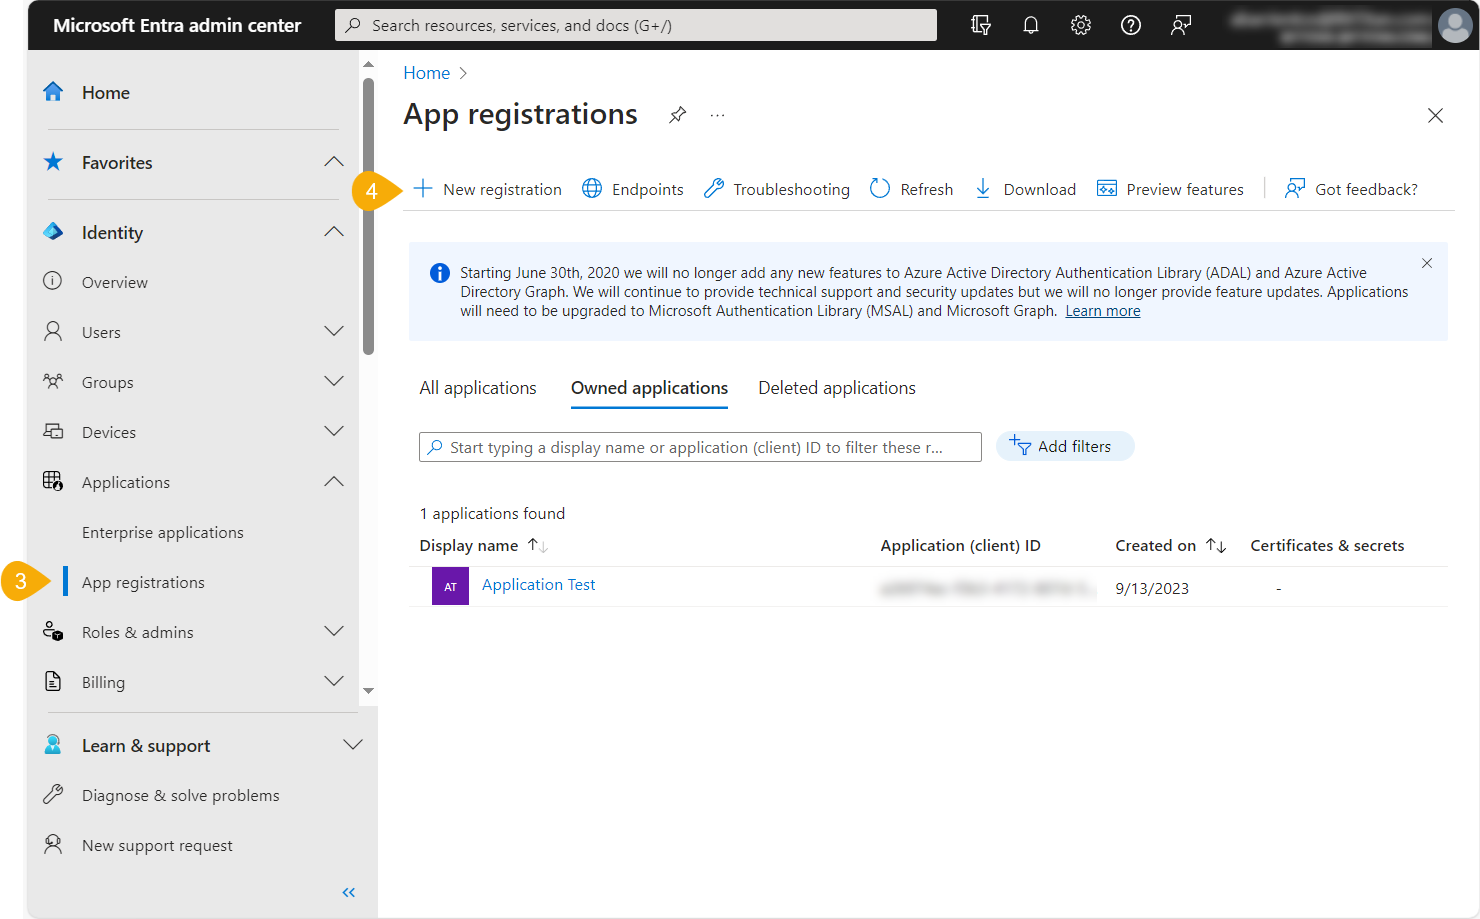
- Log in to the Microsoft Entra admin center with a Global Administrator login.
- Click View all products and select Microsoft ID (Azure AD) in the Microsoft Entra Admin Center.
- In the left sidebar, open the Applications dropdown list and select App Registrations, which is found under Identity.
- Select New Registration at the top of the screen.
- Give the app a distinct name. You can change this later if necessary.
- Select the Accounts in any organizational directory (Any Microsoft Entra ID tenant - Multi Tenant) radio button.
- Under Redirect URI (optional), select Public client/native (mobile & desktop) and set it to urn:ietf:wg:oauth:2.0:oob
- Click Register.

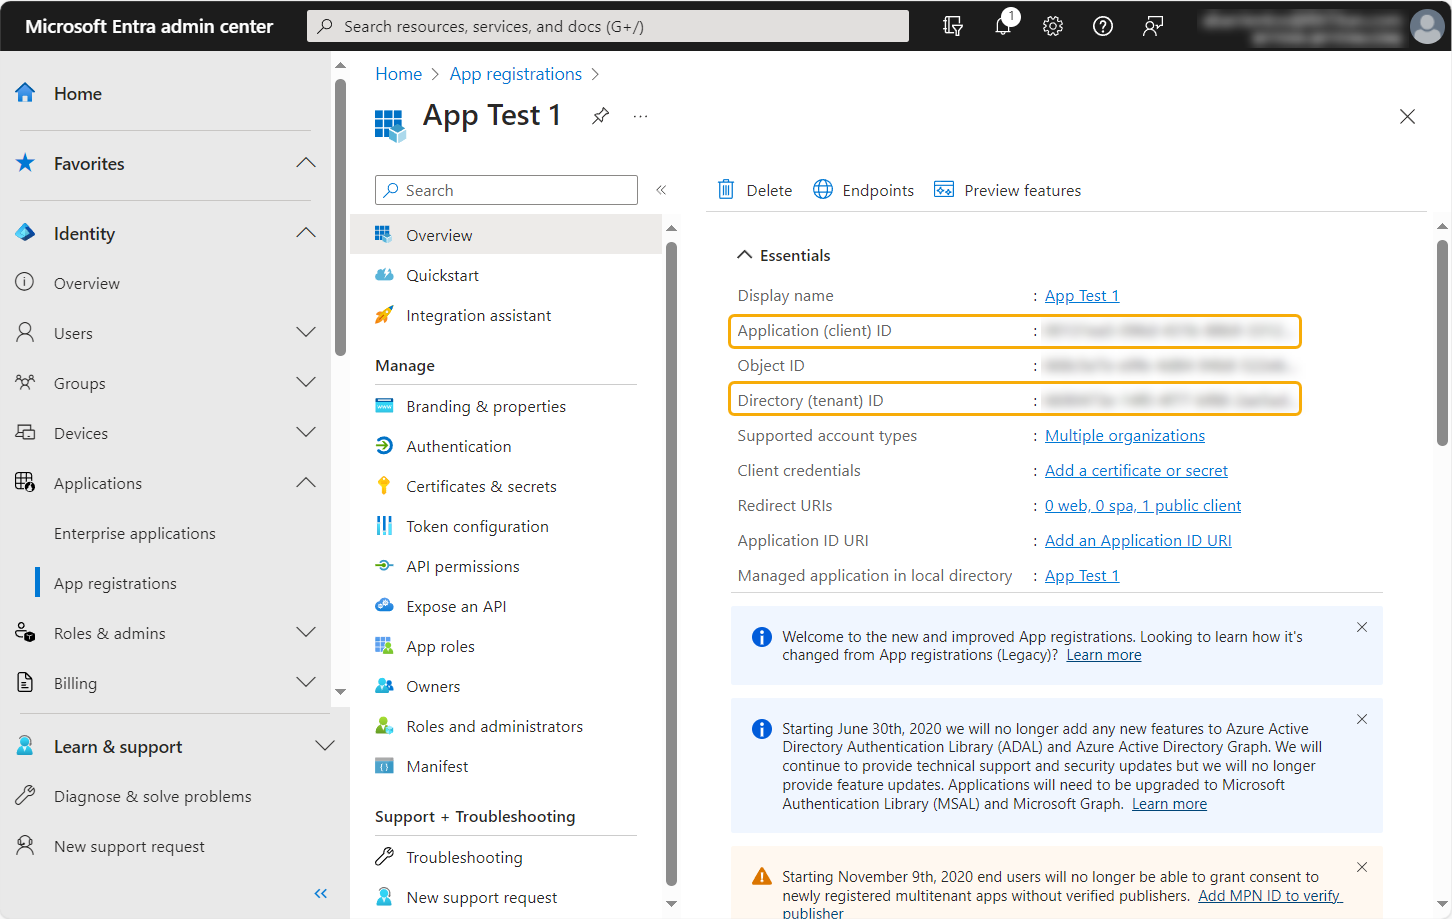
- In the Overview tab, you will find the Application (client) ID and the Directory (Tenant) ID.
- Copy both of these to another application, such as Notepad, for use later in this process.
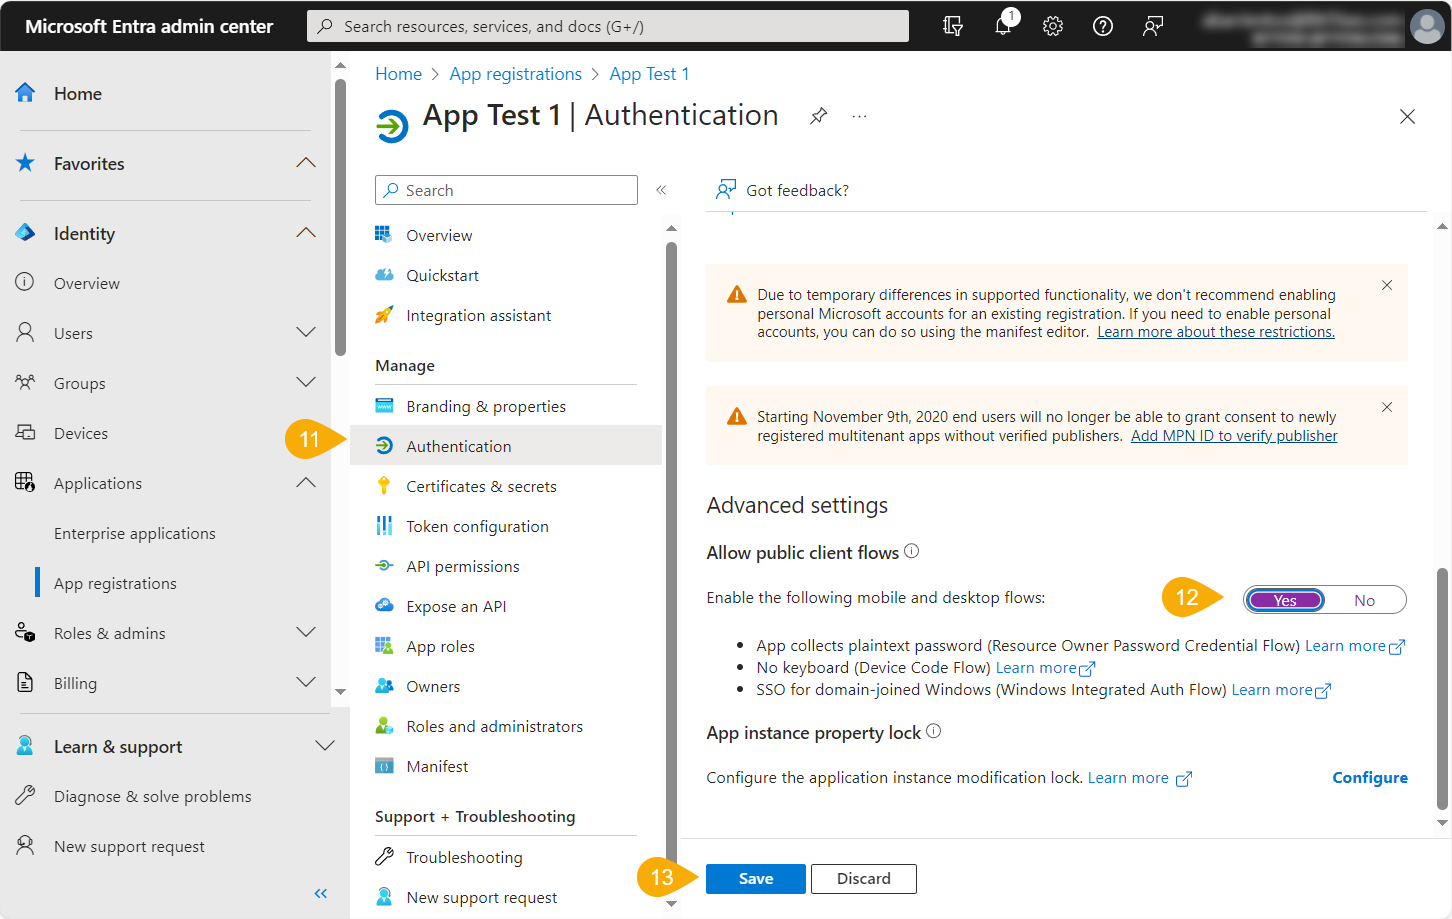
- Under the Manage menu, select Authentication.
- Set the option Allow public client flows to Yes.
- Click Save.
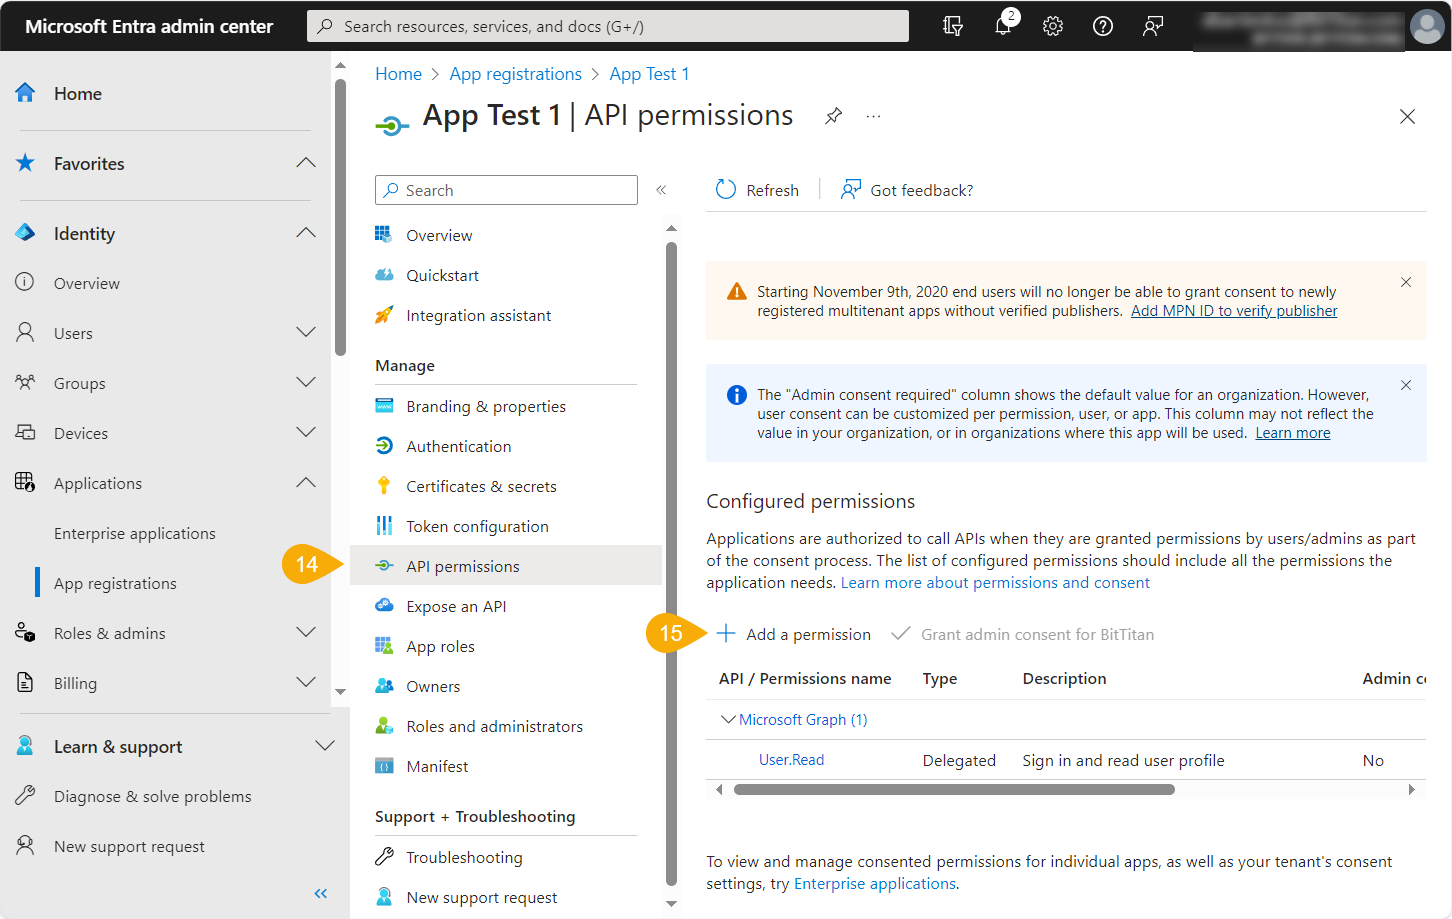
- From the Manage menu, select API permissions.
- If an API permission is named User.Read under Microsoft Graph is already present, this can be removed. The Microsoft Graph API does not apply to this project type and is not used.
- Click Add a Permission.
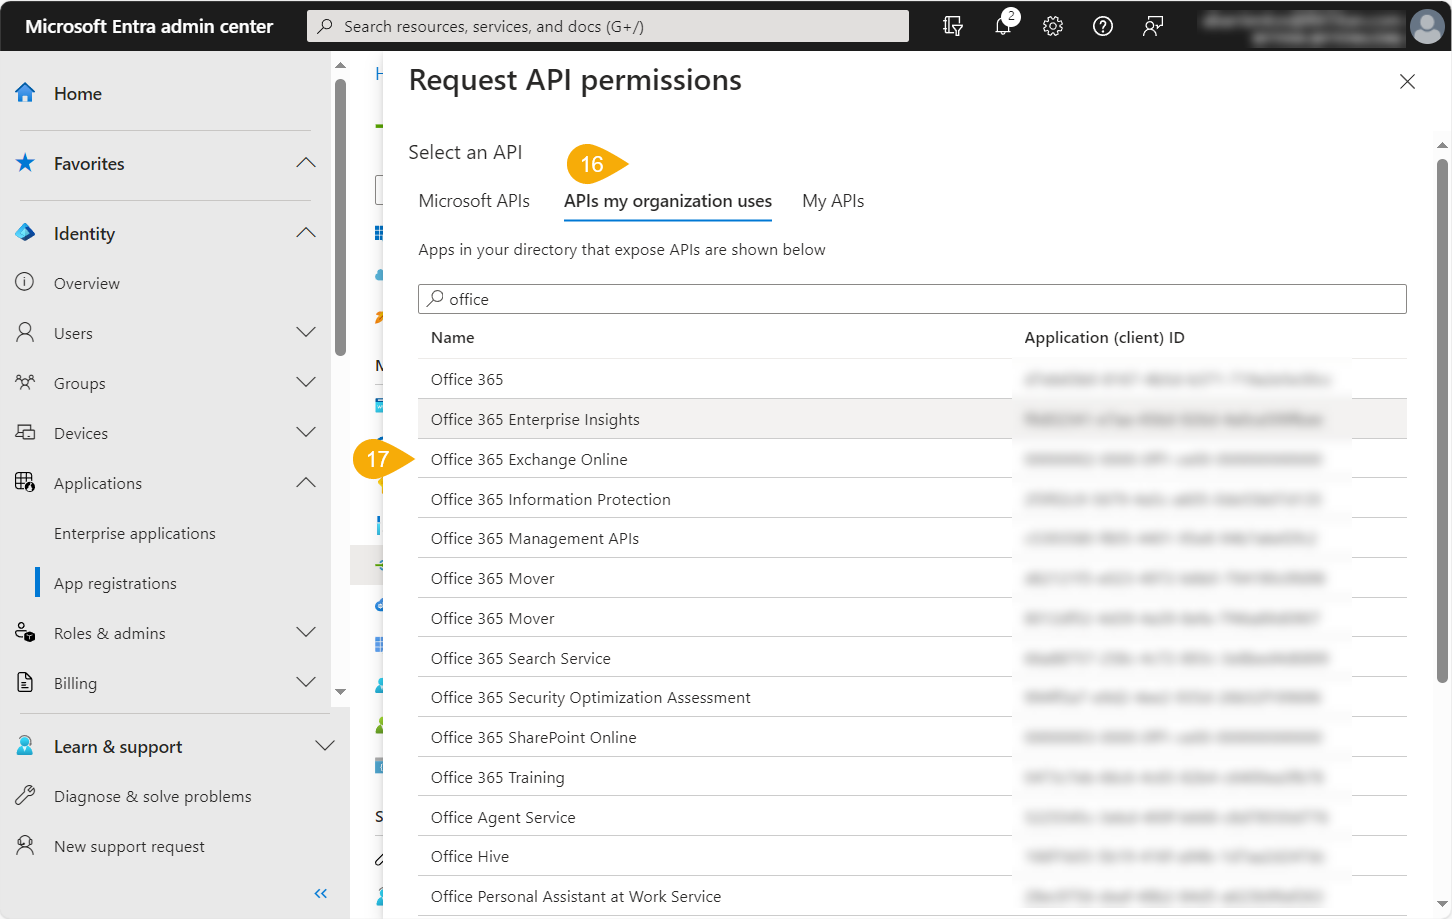
- Select APIs my organization uses.
-
Scroll down or search for the following permissions Office 365 Exchange Online.
-
Select Delegated Permissions.
-
Select EWS.
- Check the box under EWS for EWS.AccessAsUser.All.
- Click Add Permissions. This permission only allows the OAuth application (MigrationWiz) to be associated with EWS.
Important
This does not grant access to all mailbox data.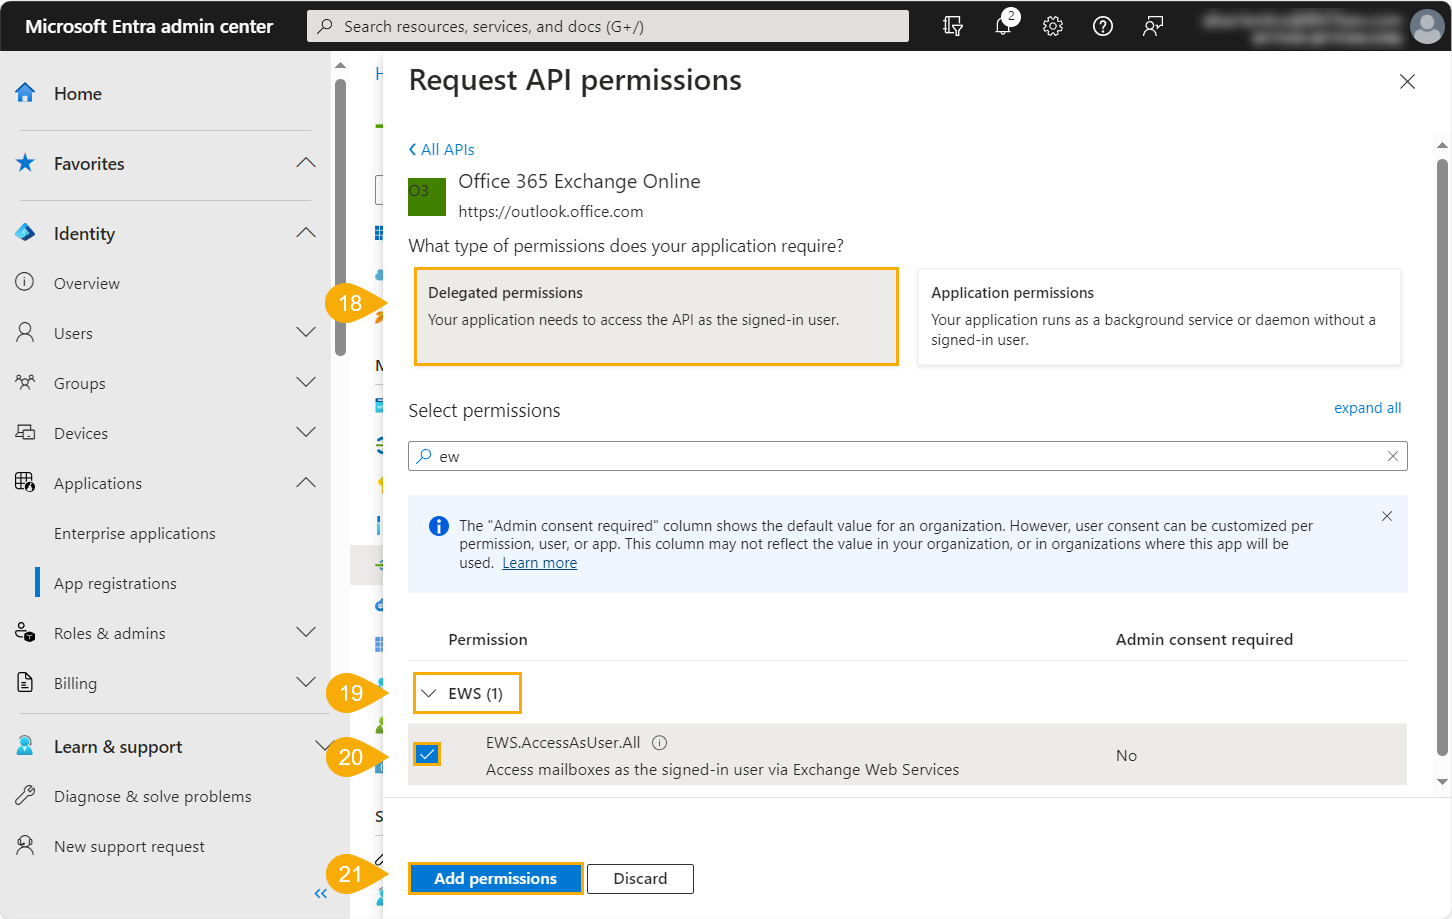
- Click Grant admin consent.
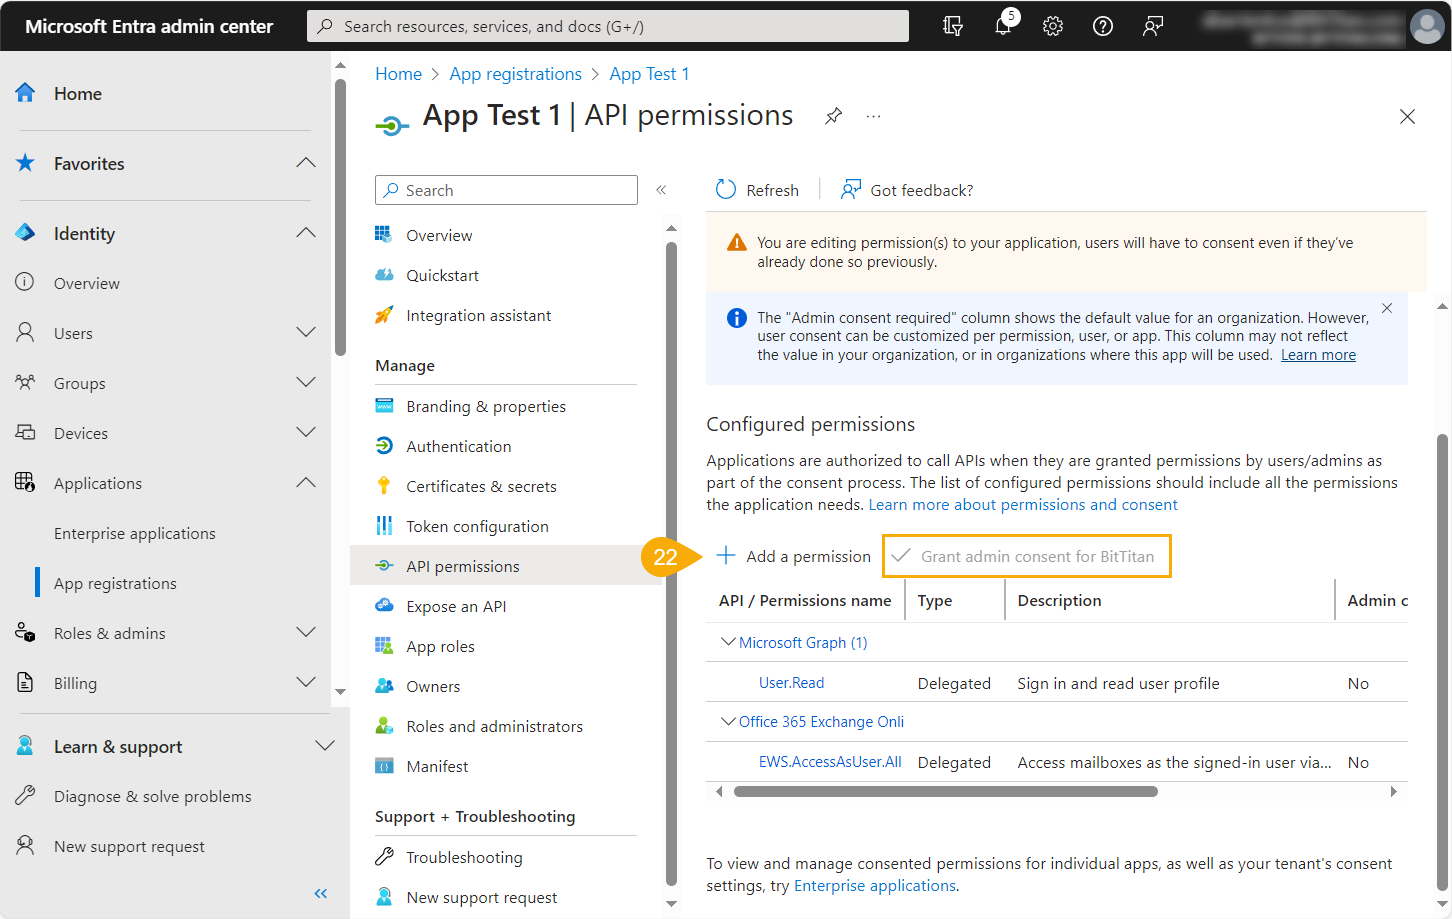
- Click Yes to confirm the settings. Under the Status column, you should see a message that permission has been granted for the domain.
