This is a setup guide that will assist you in setting up your email account on Google Nexus mobile and tablet devices using IMAP.
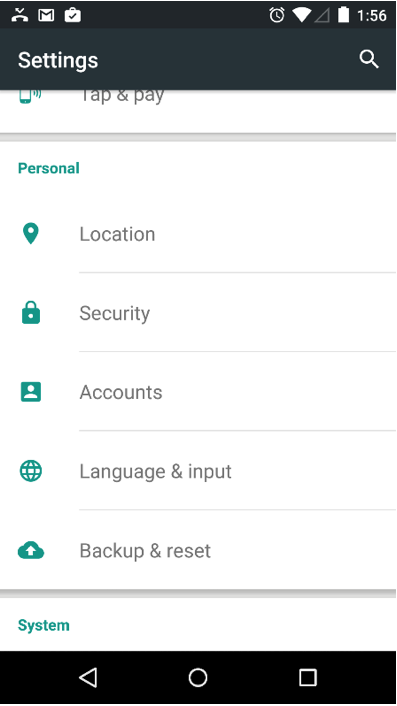
- Locate the "Settings" icon within your Apps Drawer.

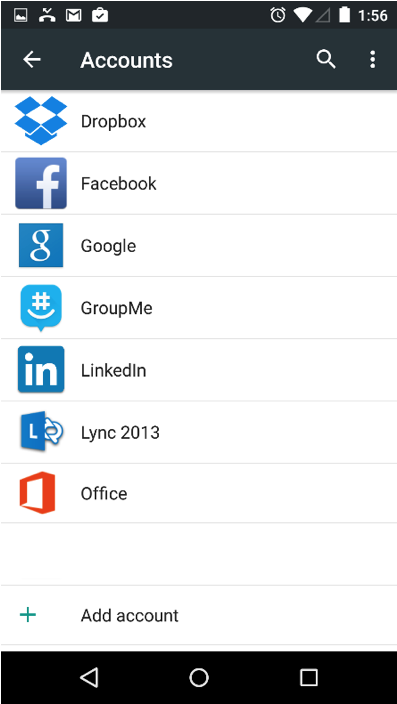
- Within Settings, scroll down to the "Personal" section and select "Accounts".
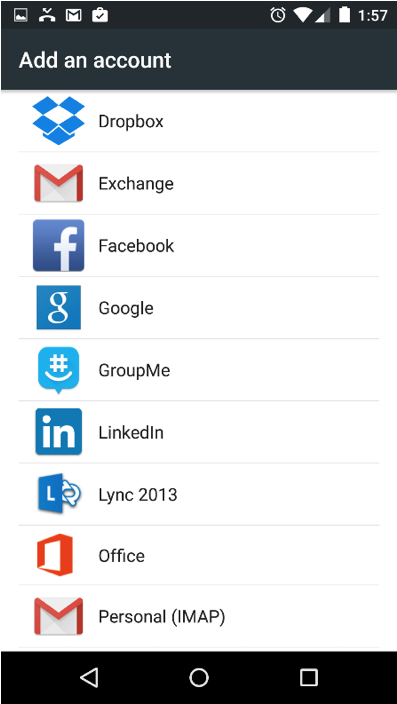
- Select "Add account".
- Select "Personal (IMAP)".
- Enter the following information:
- "Email Address": Your email address
- Enter the following information:
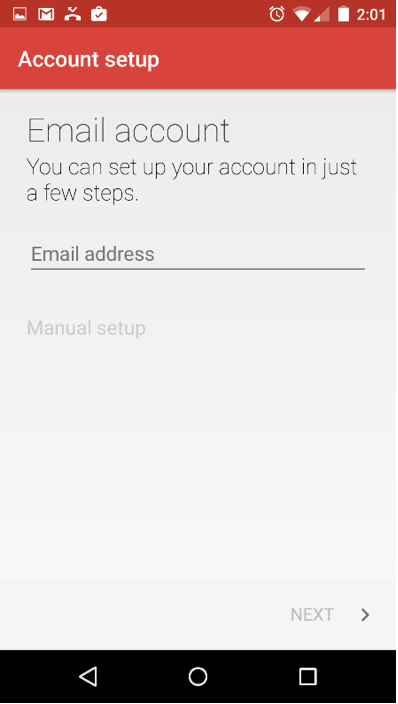
- Tap "Next".
- Enter the following information:
- "Username": Your email address
- "Password": Your email address password
- "Server": secure.emailsrvr.com
- "Port": 993
- "Security type": SSL/TLS (Accept all certificates)
- "IMAP path prefix": Leave this field blank
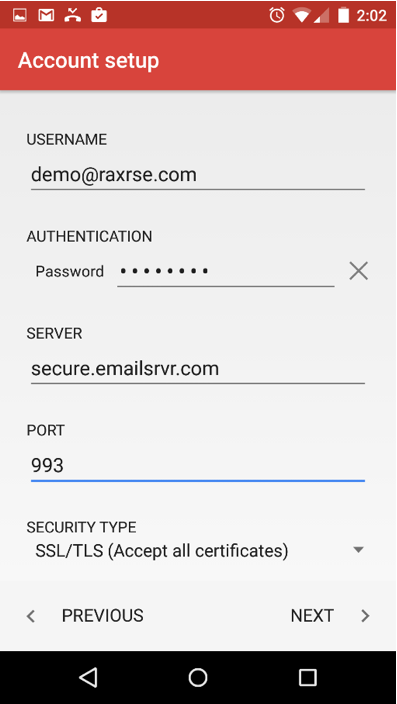
- Tap "Next".
- Enter the following information:
- "SMTP Server": secure.emailsrvr.com
- "Port": 465
- "Security Type": SSL/TLS (Accept all certificates)
- "Require signin": Checked
- "Username": Your email address
- "Password": Your email address password
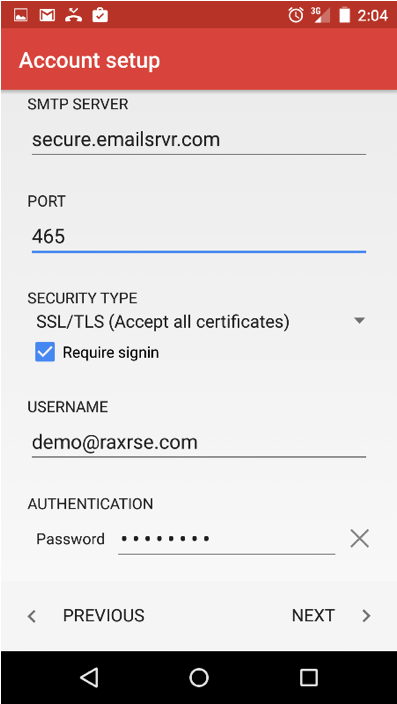
- Tap "Next".
- Adjust the displayed mailbox settings, if applicable.
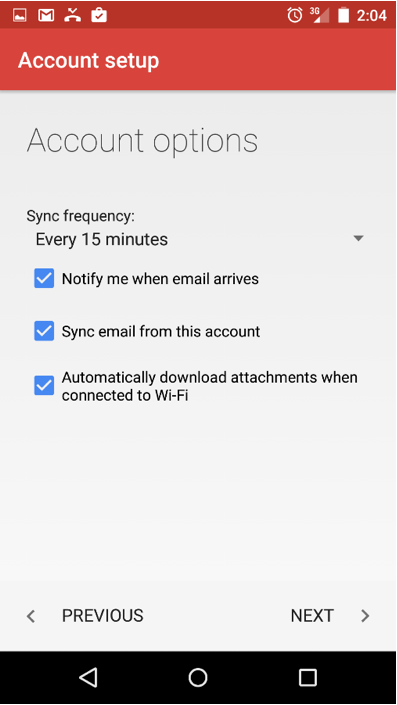
- Tap "Next".
- Success! Your Nexus device should now begin syncing with your mailbox.
