This article will assist you in setting up your iPhone or iPhone SE with your email account manually. This article assumes that you have iOS 13.4 or later installed and using the native email app on your iPhone or iPad. There is also now a new guide for setting up IMAP email on iOS 14. If you have an older version, the screenshots below may not align exactly when you add email accounts. We recommend running the latest version of iOS, if you are not yet, you can update apps before proceeding and if you are running iOS 12, please refer to this setup guide. This will ensure your phone has the latest features and security patches. These settings will also be the same for setting up email on the iPhone, iPad, Apple watch, or iPod Touch. Please note that these screenshots may look slightly different if you have dark mode enabled.
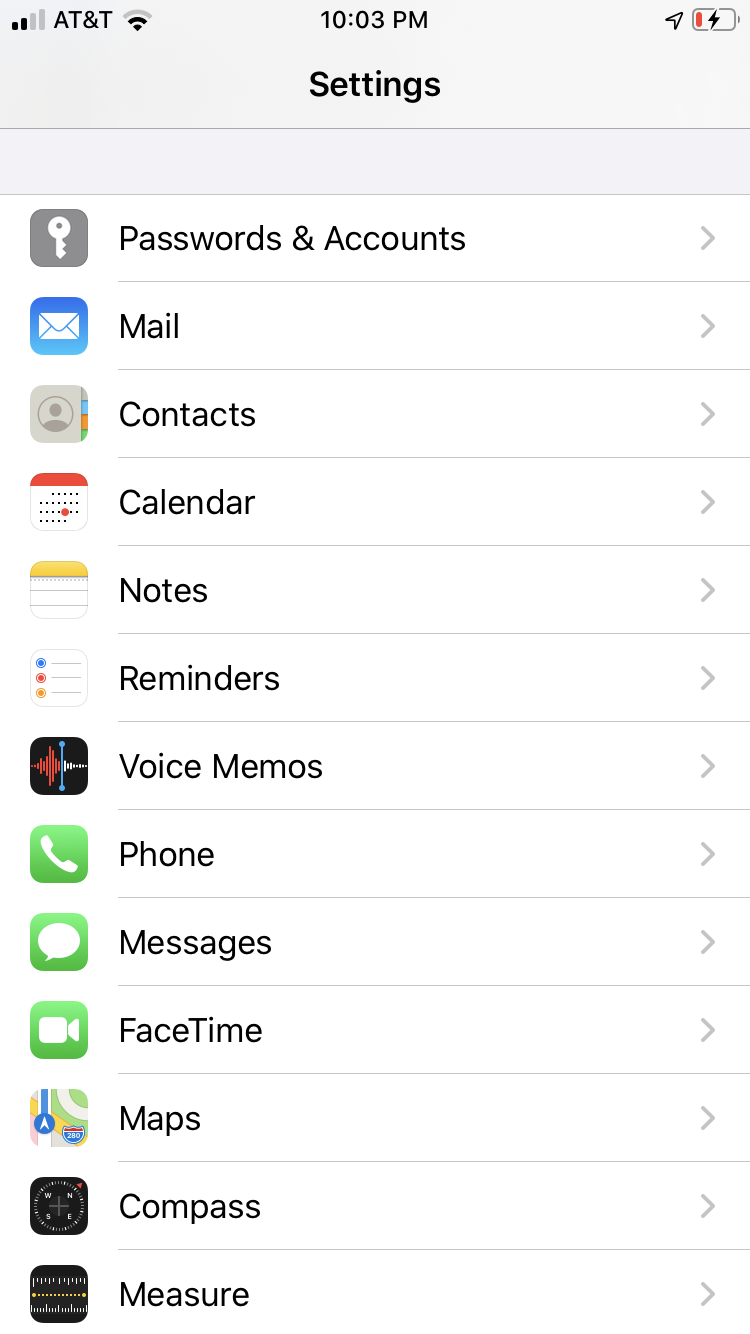
On the home screen, tap the Settings icon.
Within Settings, scroll down and tap Passwords and Accounts
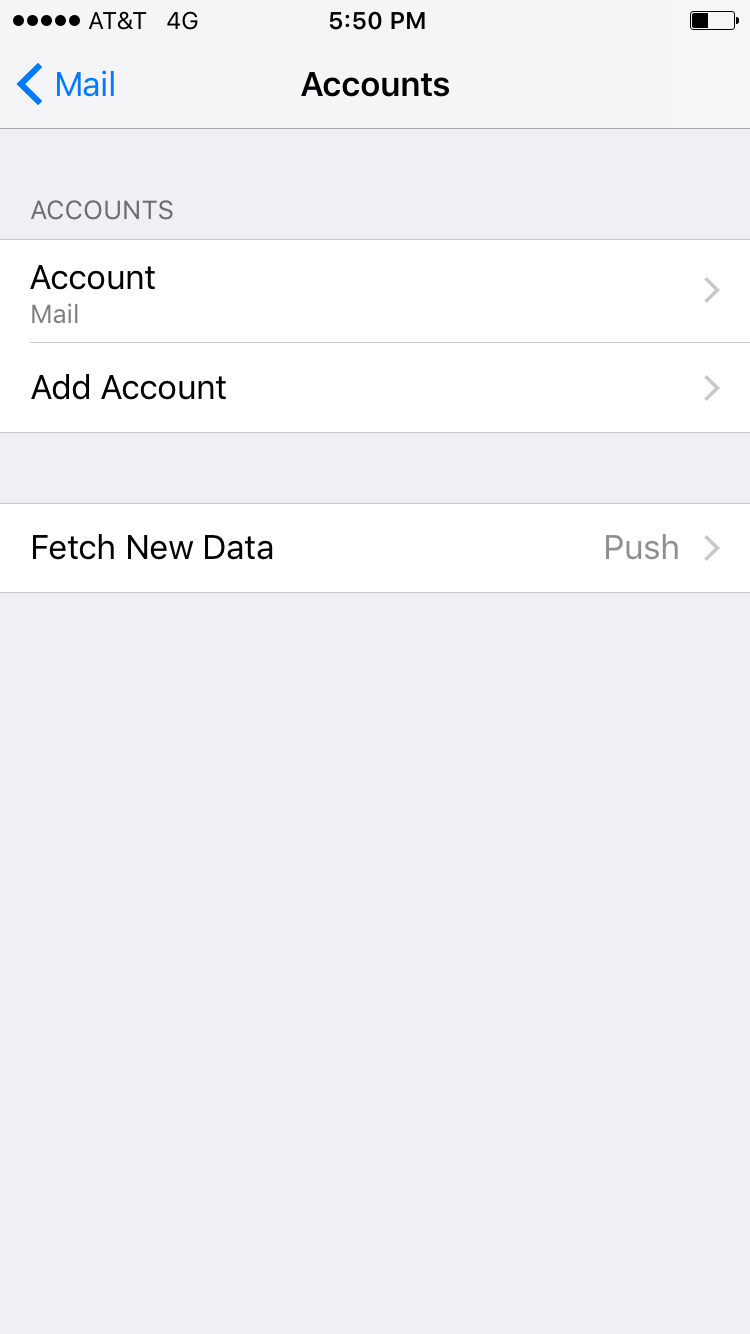
Tap Add Account to add email service.
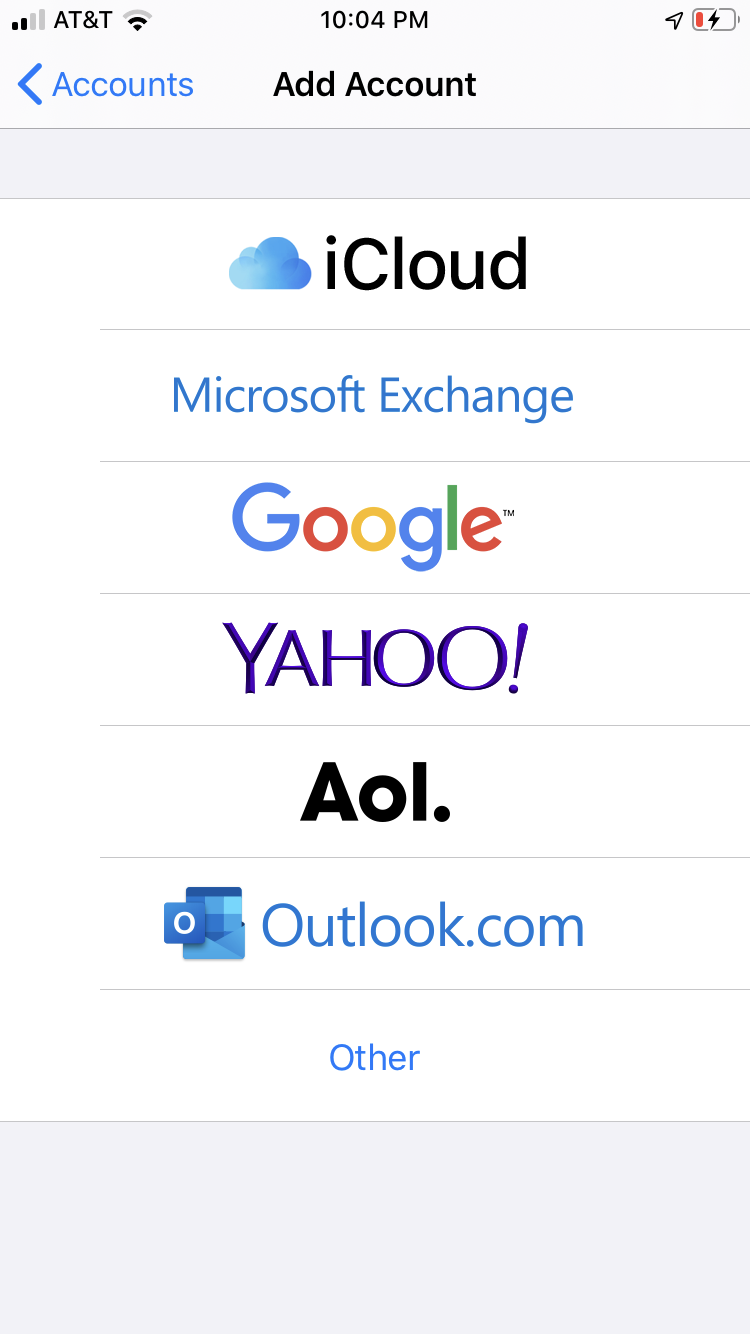
Select the type of account as Other, at the bottom of the screen on the accounts section.
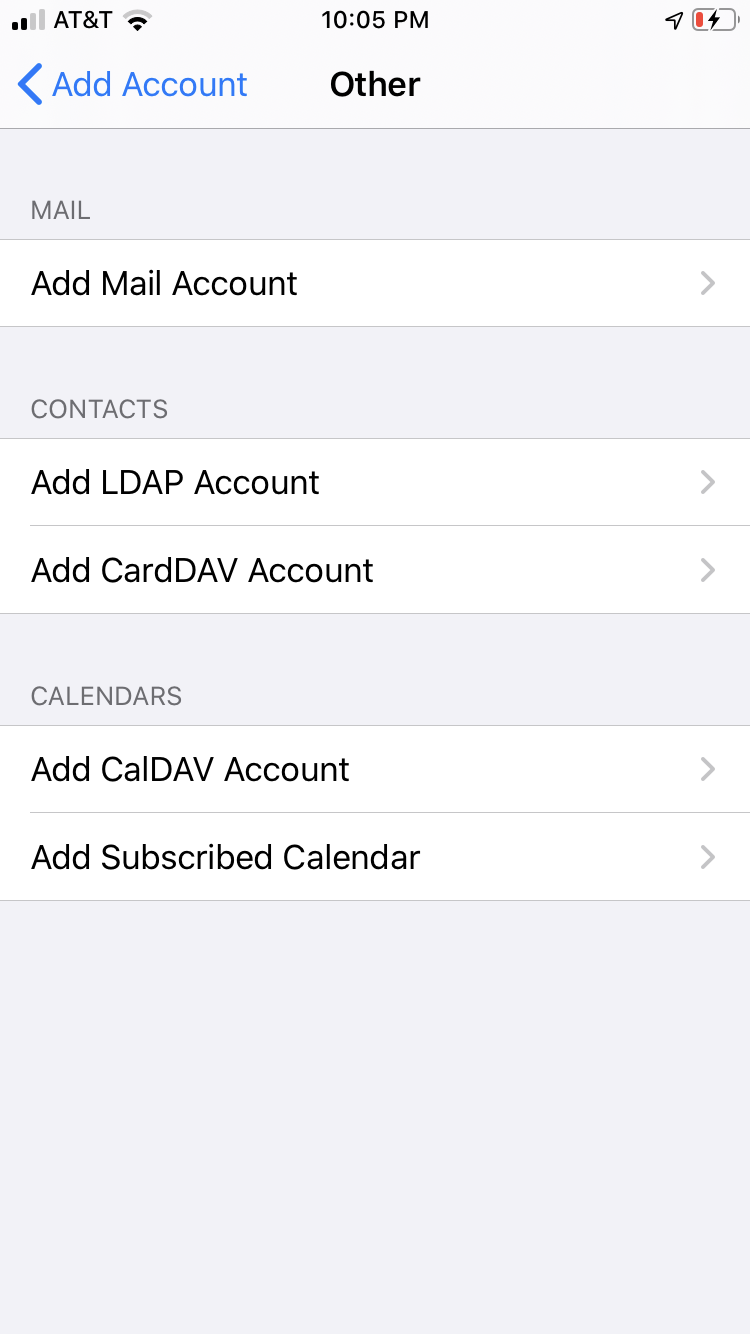
Tap Add Mail Account or tap mailboxes if you already have a mailbox list.
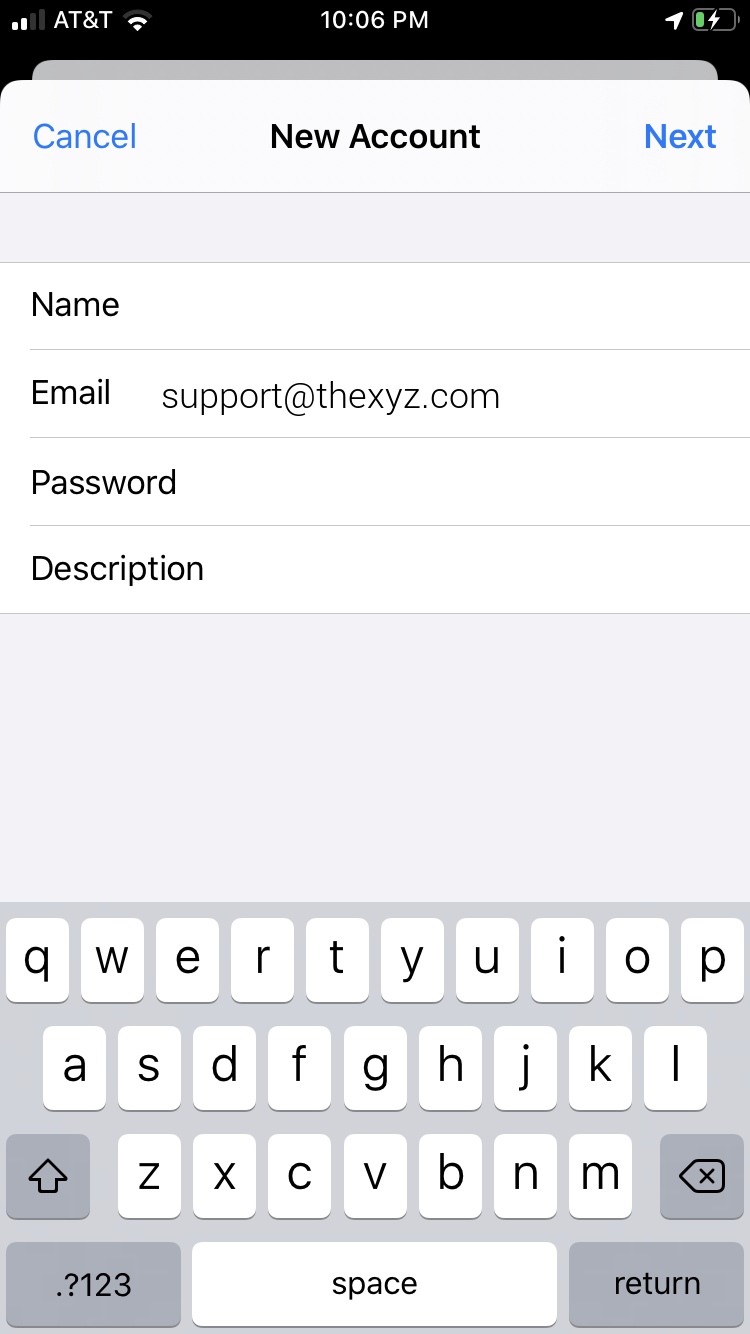
The next screen will ask for basic account information. Such as the username and password for the email account you want to add.
Name: Your first and last name
Email: Enter your email address
Password: Your mailbox password
Description: Anything you'd like, just add a description for your account
Tap Next
Once you have added your password and a description for the mailbox, make sure
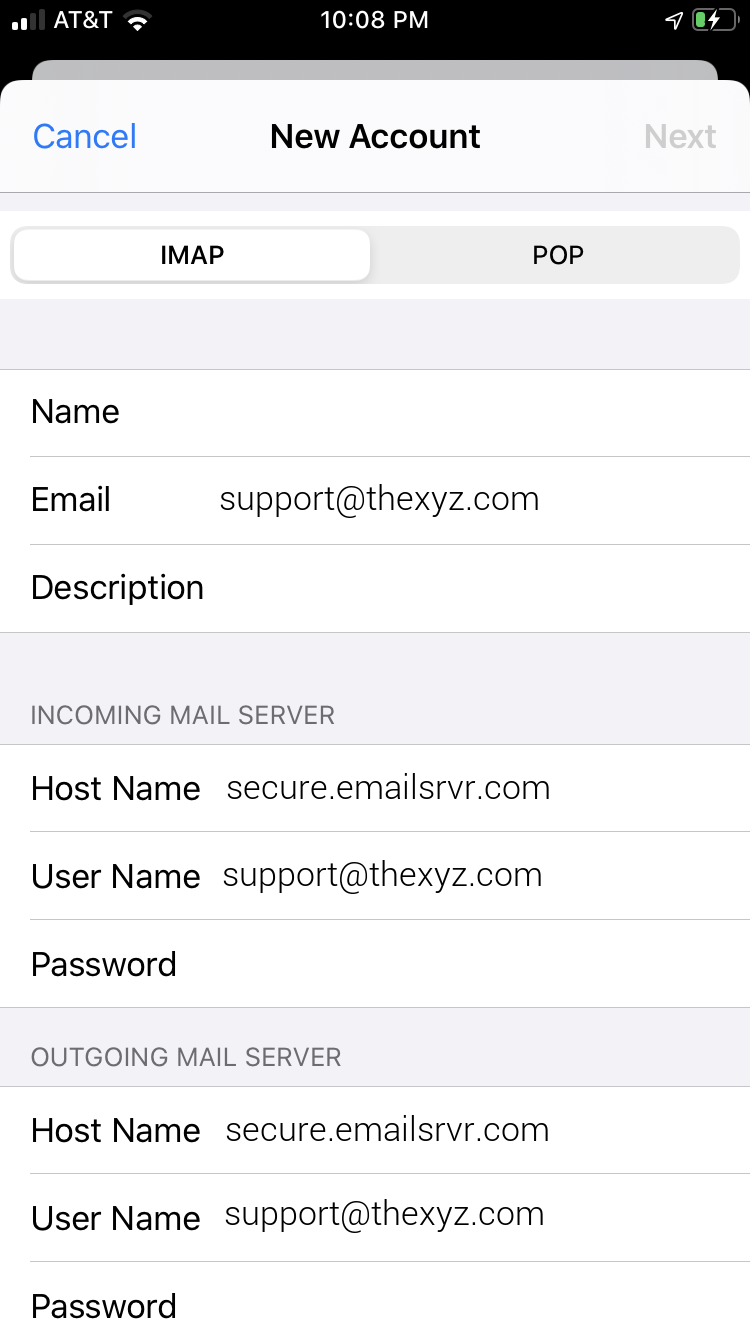
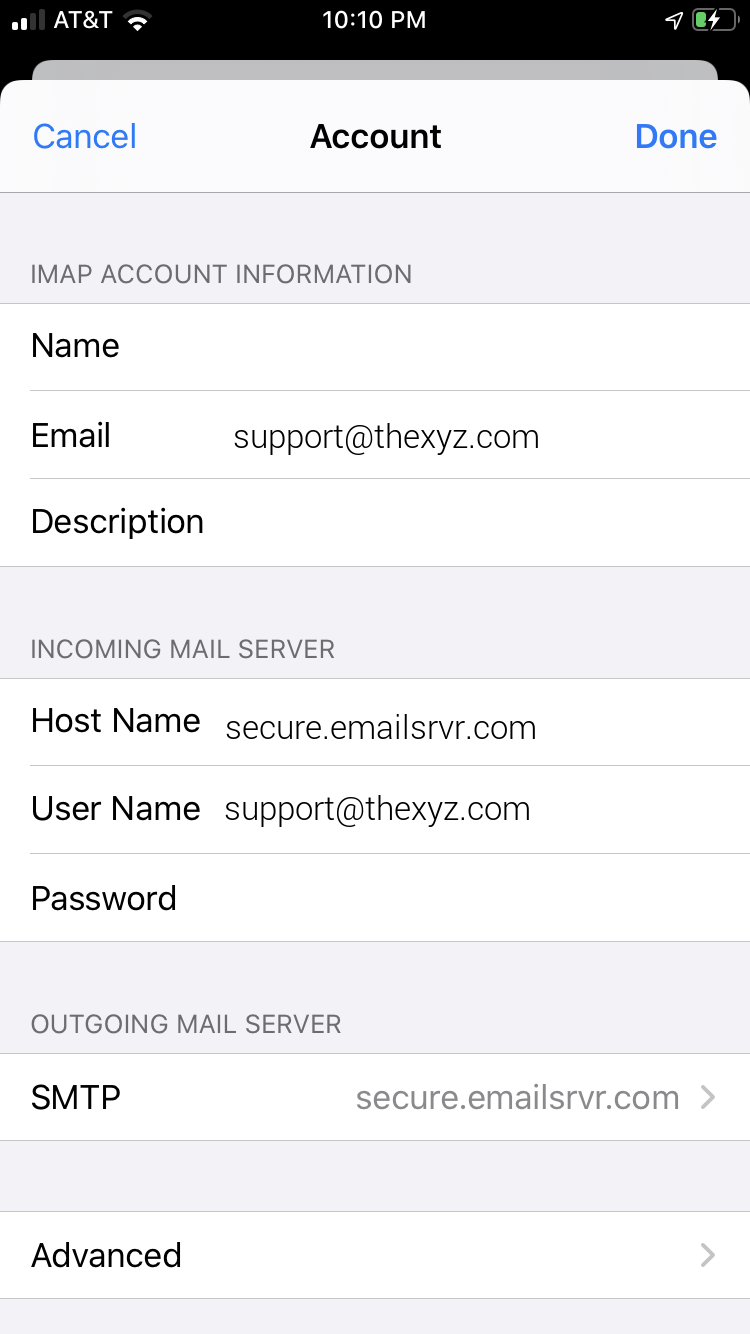
IMAP is selected when prompted to choose between IMAP or POP. Enter the following server details for the incoming mail server and outgoing mail server and make sure your email address and password are correct. This can be verified by logging into
Webmail with your default email account.
Name: Your first and last name
Email: Your email address
Description: Should already be pre-filled from the last section
Password: Your mailbox password
Incoming Server Settings
Host Name: secure.emailsrvr.com
User Name: Your email address
Password: Your mailbox password
Outgoing Server Settings
Host Name: secure.emailsrvr.com
User Name: Your email address
Password: Your mailbox password
Note: Even though it says optional on an iOS device, they are NOT optional. If you skip these fields, you will NOT be able to send out email.
Tap
Next
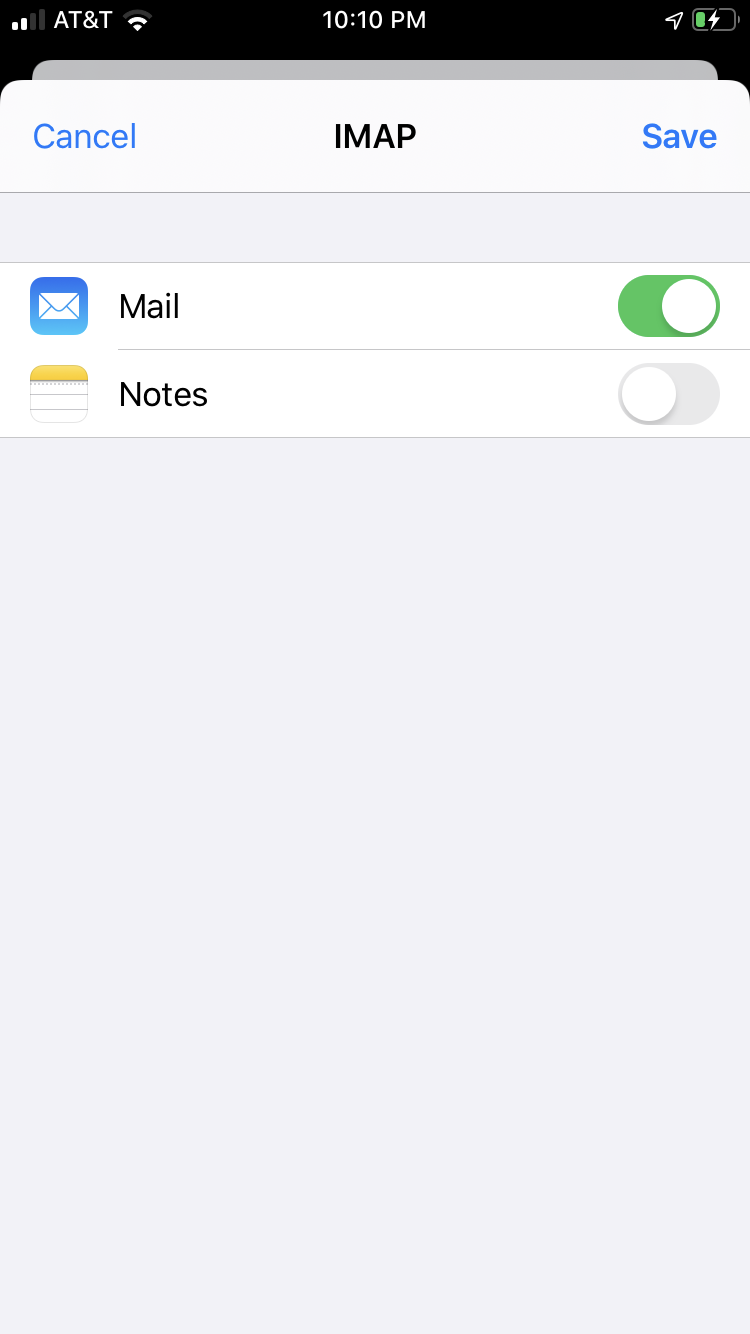
Select the desired email settings and tap
Save.
Additional Information
Now we have your email account to your iPhone setup, you should start to see incoming messages arrive in your mailbox when you open the mail app. Now we are configuring your iPhone to sync your various IMAP folders and prevent duplicate folders from showing up. We call this Folder Mapping; below are the steps to do so for email accounts added to iPhone and iPad.
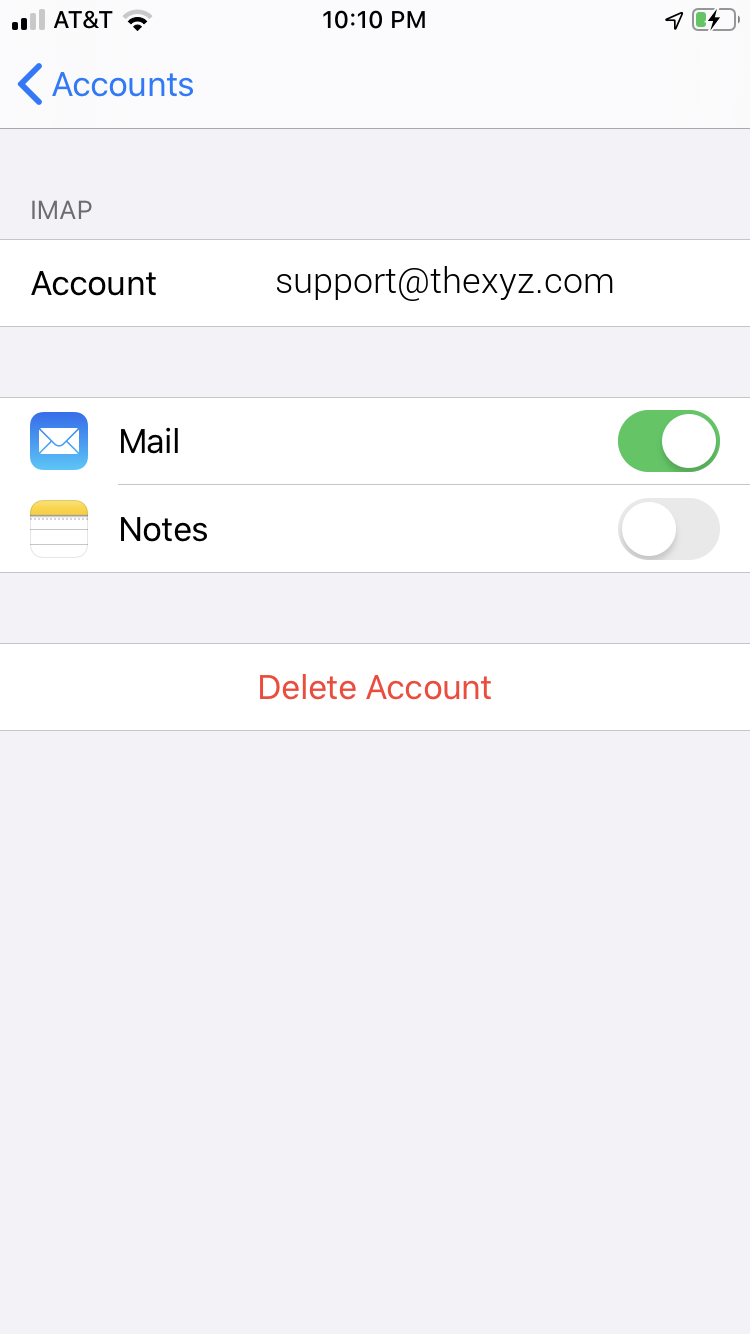
Within the Mail settings app window, select the account that you just added
Under IMAP, tap Account at the top left corner or tap Account to see more settings.
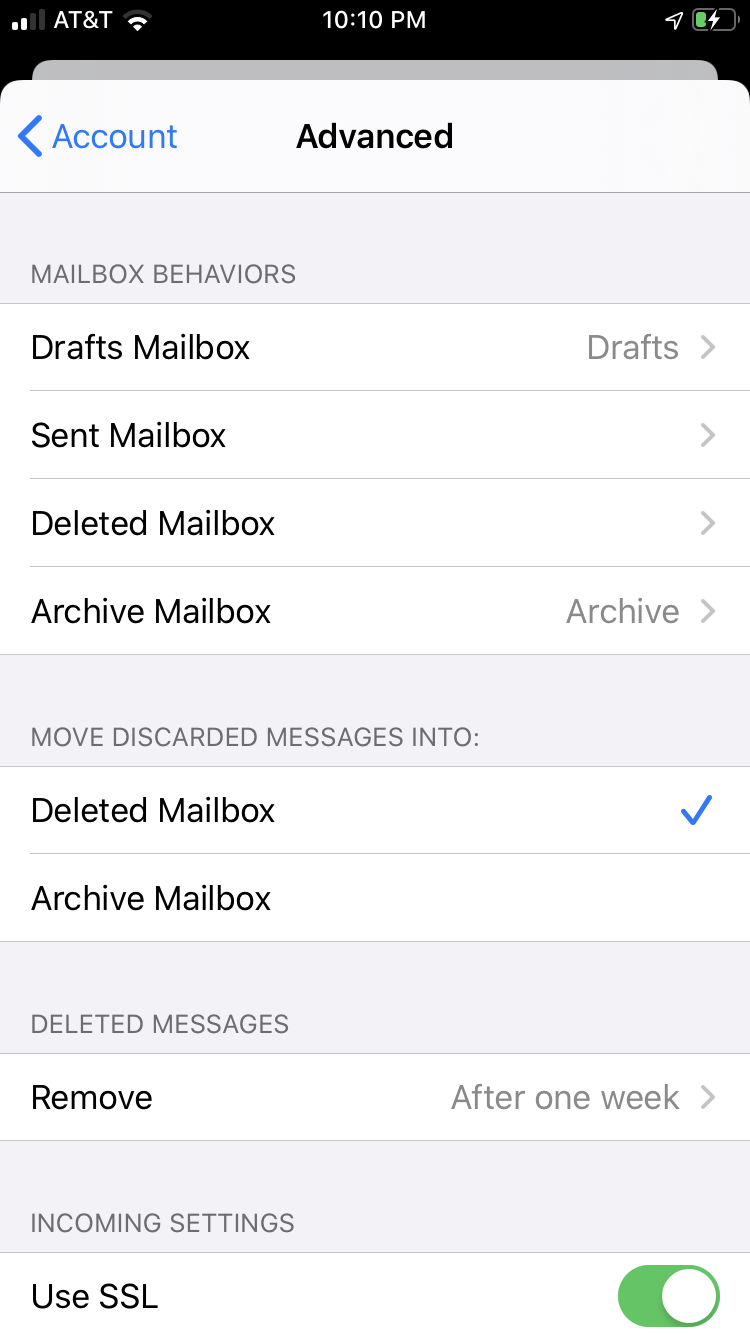
Within the account settings, select Advanced at the bottom
Now you should have the email setup and should see the account in the mail app, there is still another step to better configure the mailbox from iOS defaults.
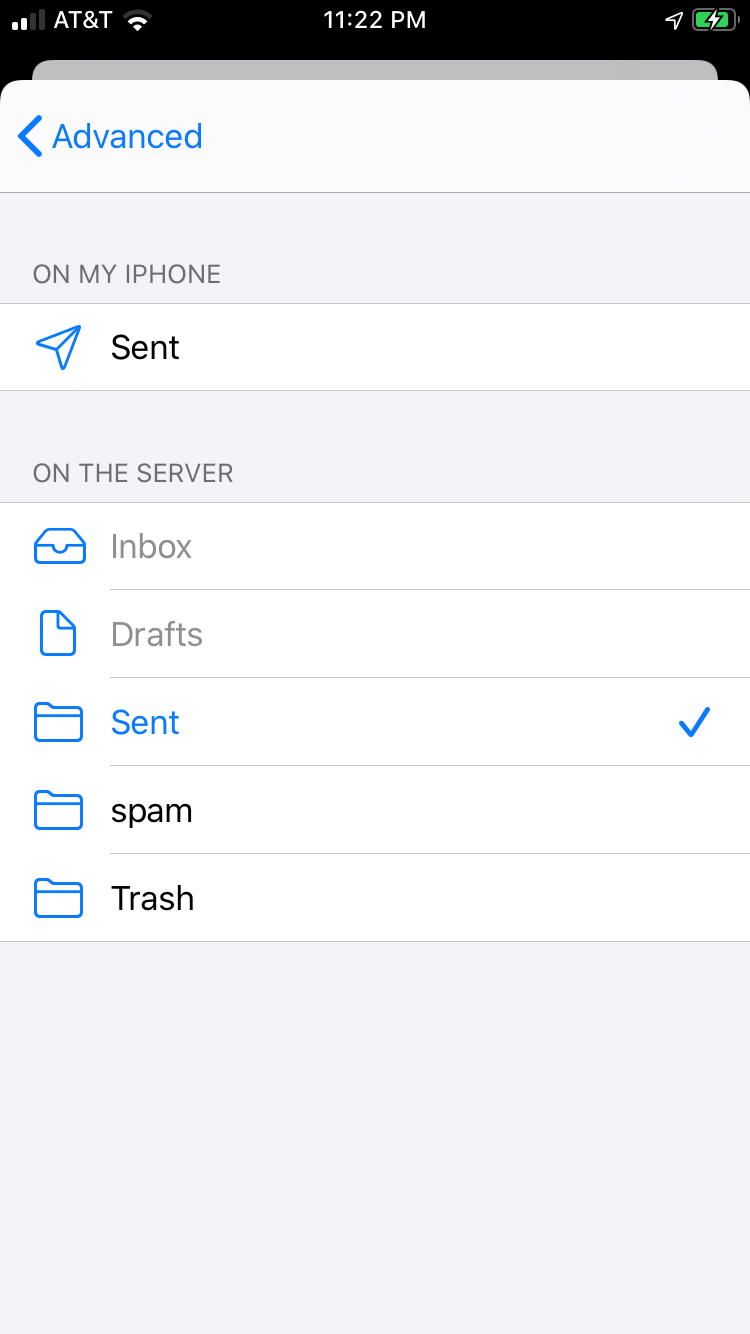
Under MAILBOX BEHAVIORS, select Sent Mailbox
Select the appropriate folder under ON THE SERVER.
Now repeat the previous step for Deleted Mailbox.
Ignore the Archive Mailbox, it won't be used. Last step!
Make sure Deleted Mailbox is selected under MOVE DISCARDED MESSAGES INTO.
This will ensure deleted messages are automatically set to go to the Deleted Mailbox folder. Now you're done!
With your email account set up, go back to the home screen and launch the Mail app or tap the mail icon on your device. Your email should appear within a few minutes, depending on the amount of items to sync. You are now finished editing the settings mail needs to view email in the Mail app.
Note: If you have a large mailbox, it may take several minutes before email appears in the account in the Mail app on your iPhone, iPad, or iPod touch. Please wait at least 15 minutes before troubleshooting email messages not being delivered. This guide also shows manual setup instructions as autodiscover often has trouble when it tries and finds your email server settings automatically. You can set up email on iOS automatically or manually.
